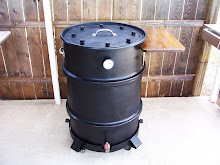
I started with a 2' square piece of expanded metal. Measured 6" in from the sides and 6" in from the ends...this is how tall I wanted the basket to be.
I was able to cut the metal with some heavy duty metal snips.
I bent the metal on the ends first...using a 2x4 as a guide and a hammer. If you can bend it by hand, that's great...lol ....I couldn't. :)
Then I folded the sides in and attached them to the ends using small bolts and nuts.
The basket without baling wire handles.
35 minutes and 2 bandaids later I have a nice little charcoal basket. :)


10 comments:
With this doesnt that mean the cooking grate is about 16-18 inches from the hot coal
Hi Matt,
I think I just e-mailed you. lol
If you are the same Matt!
Yes it brings the heat closer to the food, but works out just fine!
i am the same matt.. or i hope so. haha
Ha ha.. I e-mailed ya then :) Let me know if you didn't get it!
thanks for the write up, I mad one just like it minus the bandaids!
Will
lol Thanks Will! Glad to hear you didn't need the bandaids. :)
I used my drum today, that original coal basket is still working out great. It looks like it will last me a few more years.
Thanks for stopping by Will!
jeanie
I made a charcoal basket the easy way. I took 2 pieces of the welding grate metal, overlapped them and folded up the sides to make a good sized square basket, took them down to my local automotive repair shop and had them tack weld the corners and bottom for $5.00. Took them about 5 minutes.
No need for cuts or nuts and bolts.
Good idea Mark! Thanks. :)
Nice charcoal bin :) im in a hury to ake an emrgency drum for this weekend. aking PP for an scoolband sumer party. might use this idea :)
Thanks Jeanie
Thank you Alf! Hope your cookout went well. I am behind on reading.. Looking forward to seeing what you have been cooking. :)
Thanks for stopping by!
Post a Comment