
These chicken pluckers have been around for years. You can buy kits and plans online for several hundred dollars but they look so simple that I figured it would be easy to put one together myself with minimal cost.
So, the last few weeks I've been on the lookout for things that I might use to throw this thing together.
What I used.
1 plastic barrel.....already had it on hand
2x4.....had on hand
1x6 board.....leftover from another project
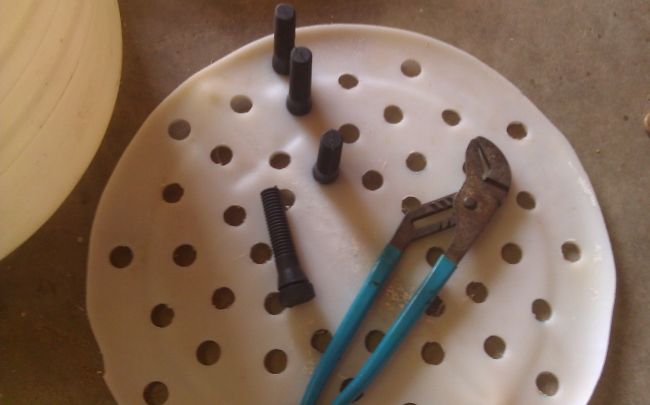
rubber fingers.... had to buy them. Used $32. worth (the most expensive part of the project) I had hoped to find something I could use in place of the fingers but I didn't have anything around the farm that would work.
screws....had on hand
bolts and nuts..... $6.00
pulley, shaft and brackets......salvaged from an old swamp cooler
idler pulley.......salvaged from an old air compressor
1 hp motor.....salvaged from same old air compressor
belt.....had on hand
electric box and switch.....$10.
1 pizza pan.....$1.
Think that's all. :)
Total cost..... $49.
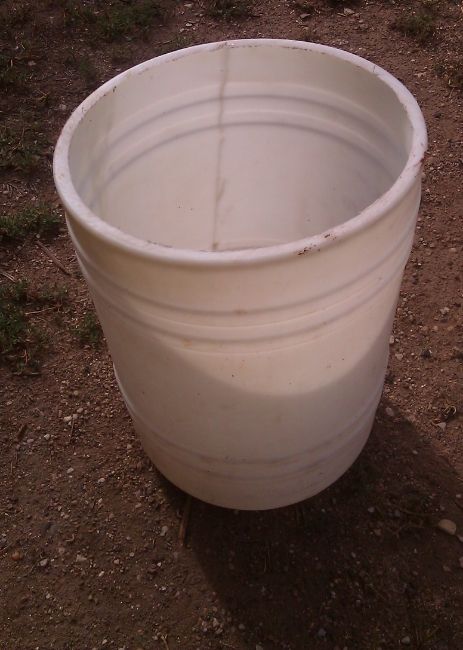
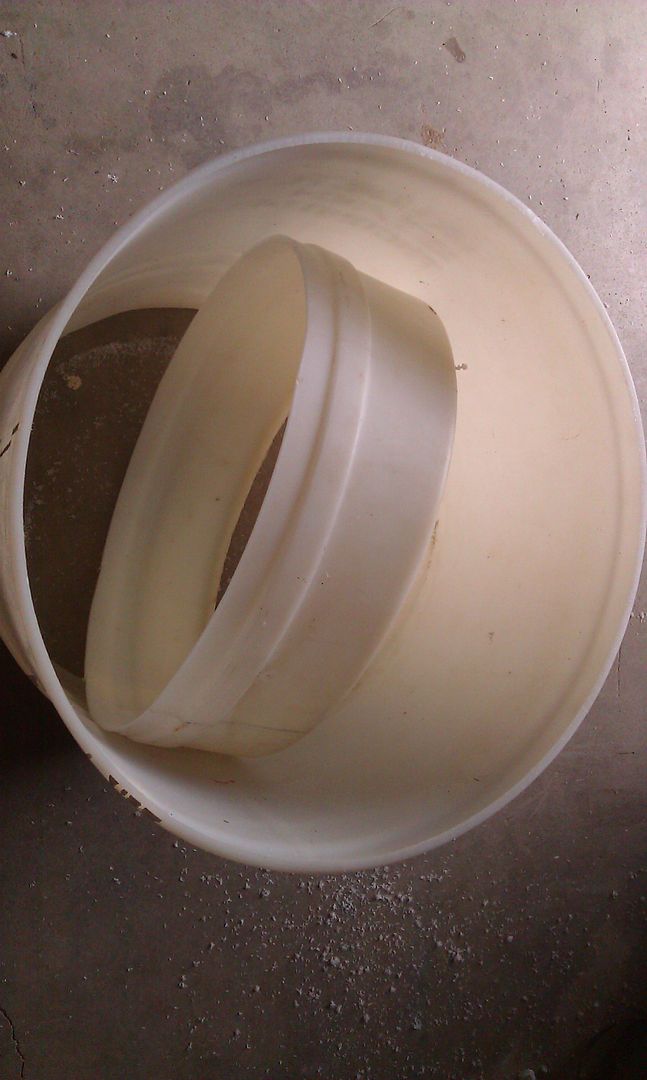
Started with the plastic barrel...
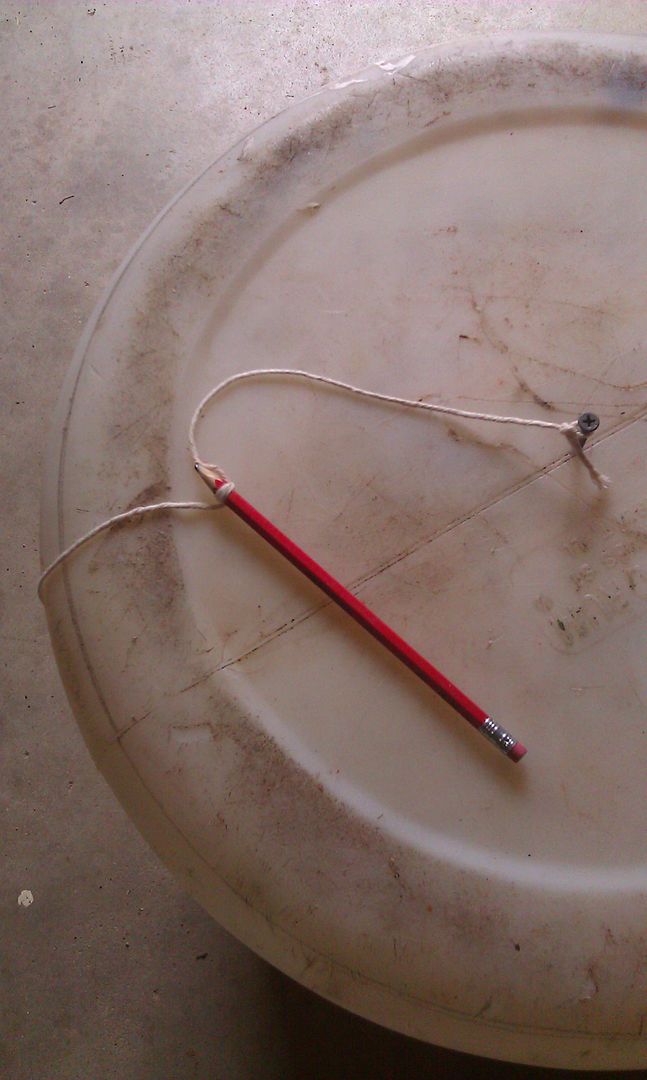
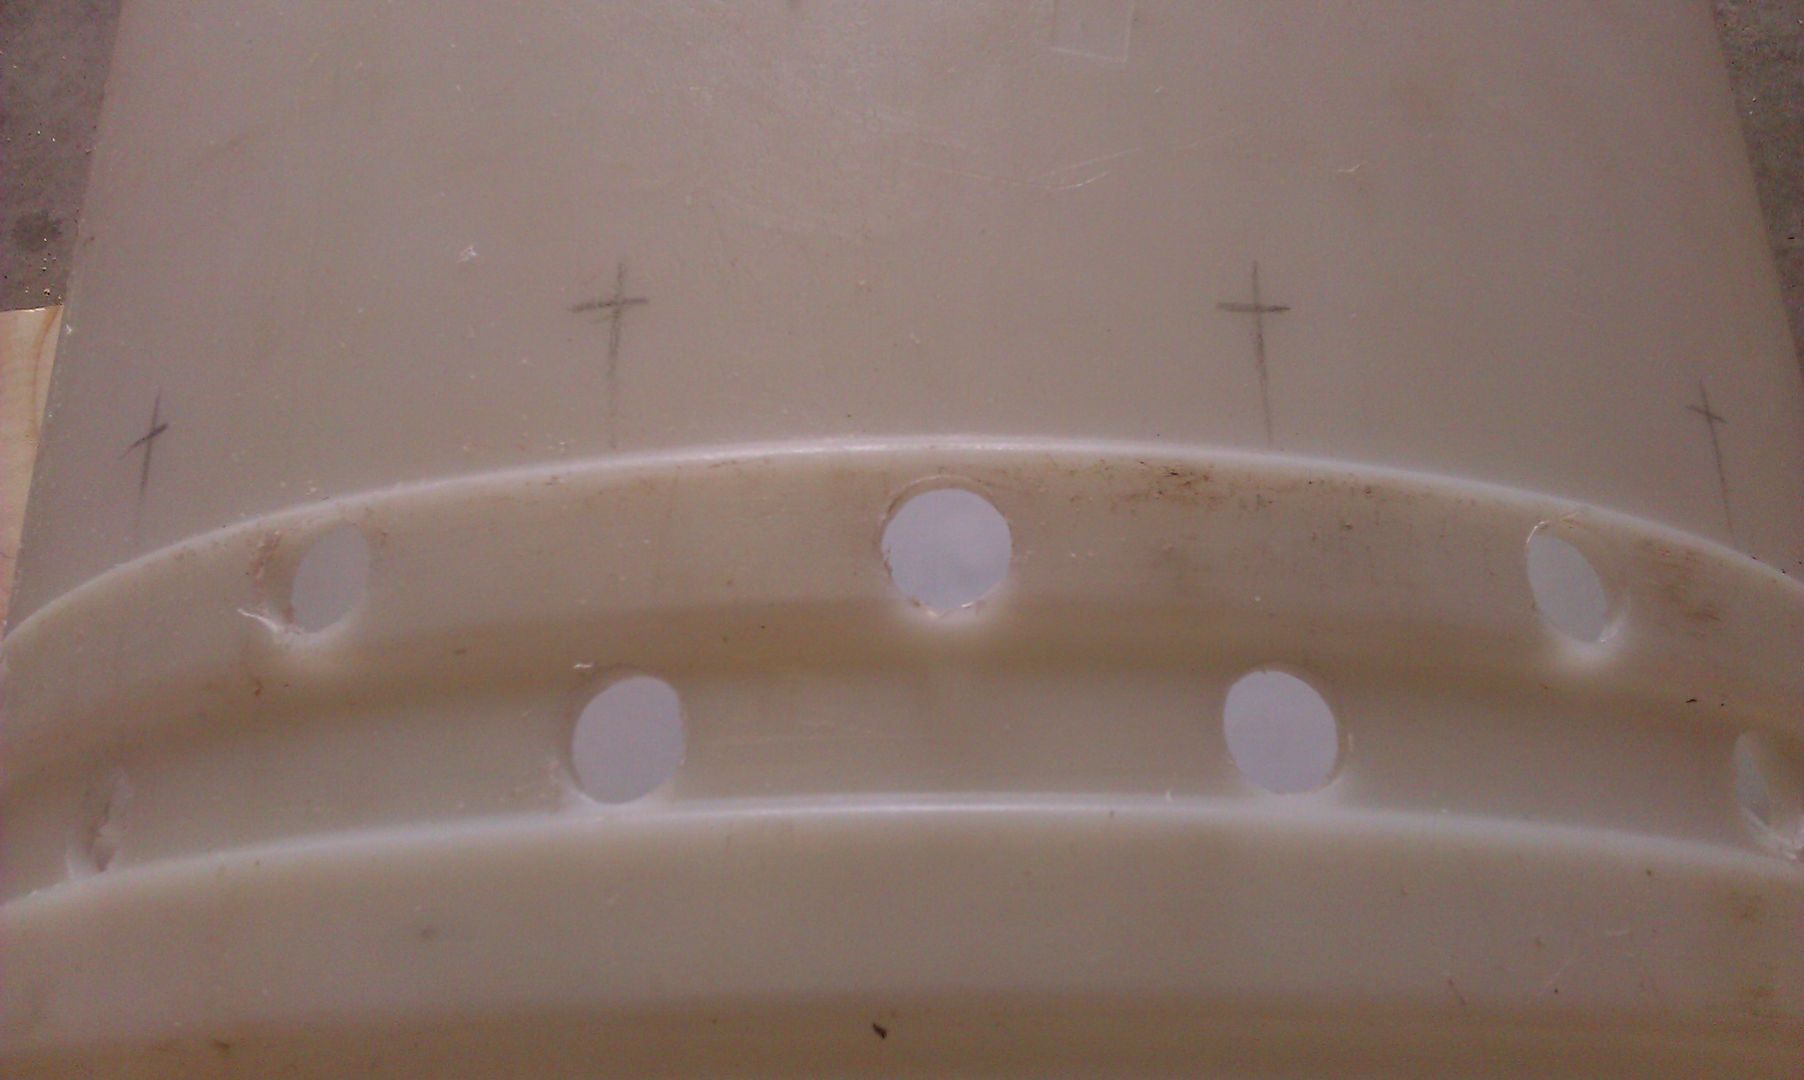
marked the bottom of the barrel where I wanted to drill holes for the "fingers" and where I wanted to cut the bottom of the barrel out.
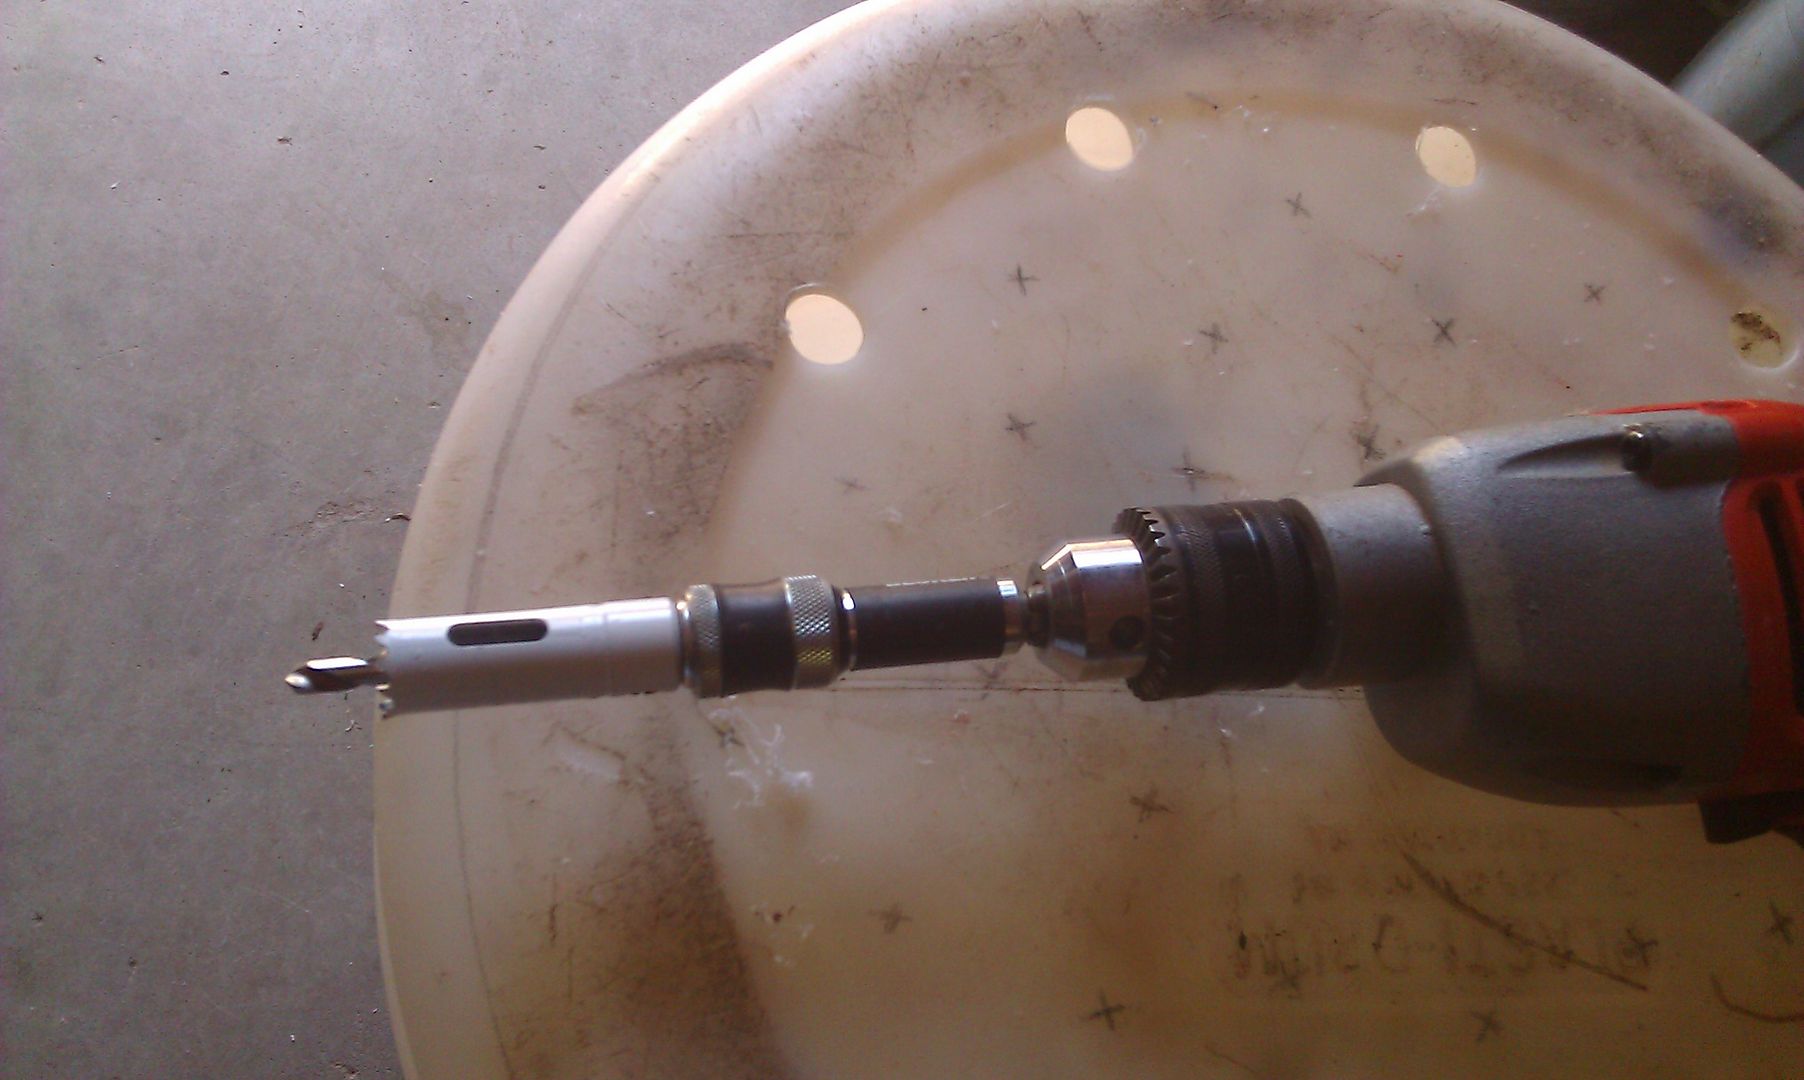
Cut the bottom of the barrel out....

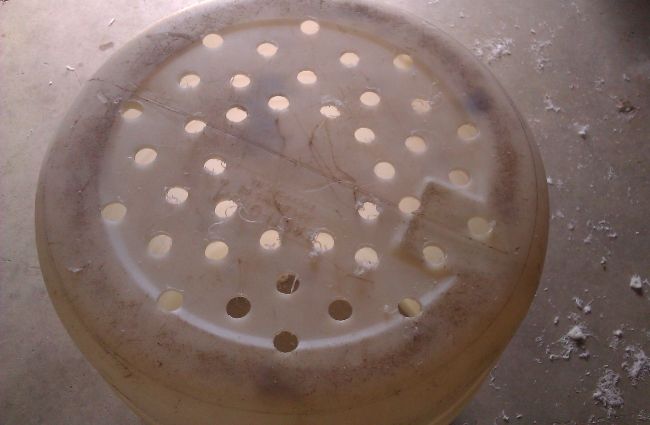
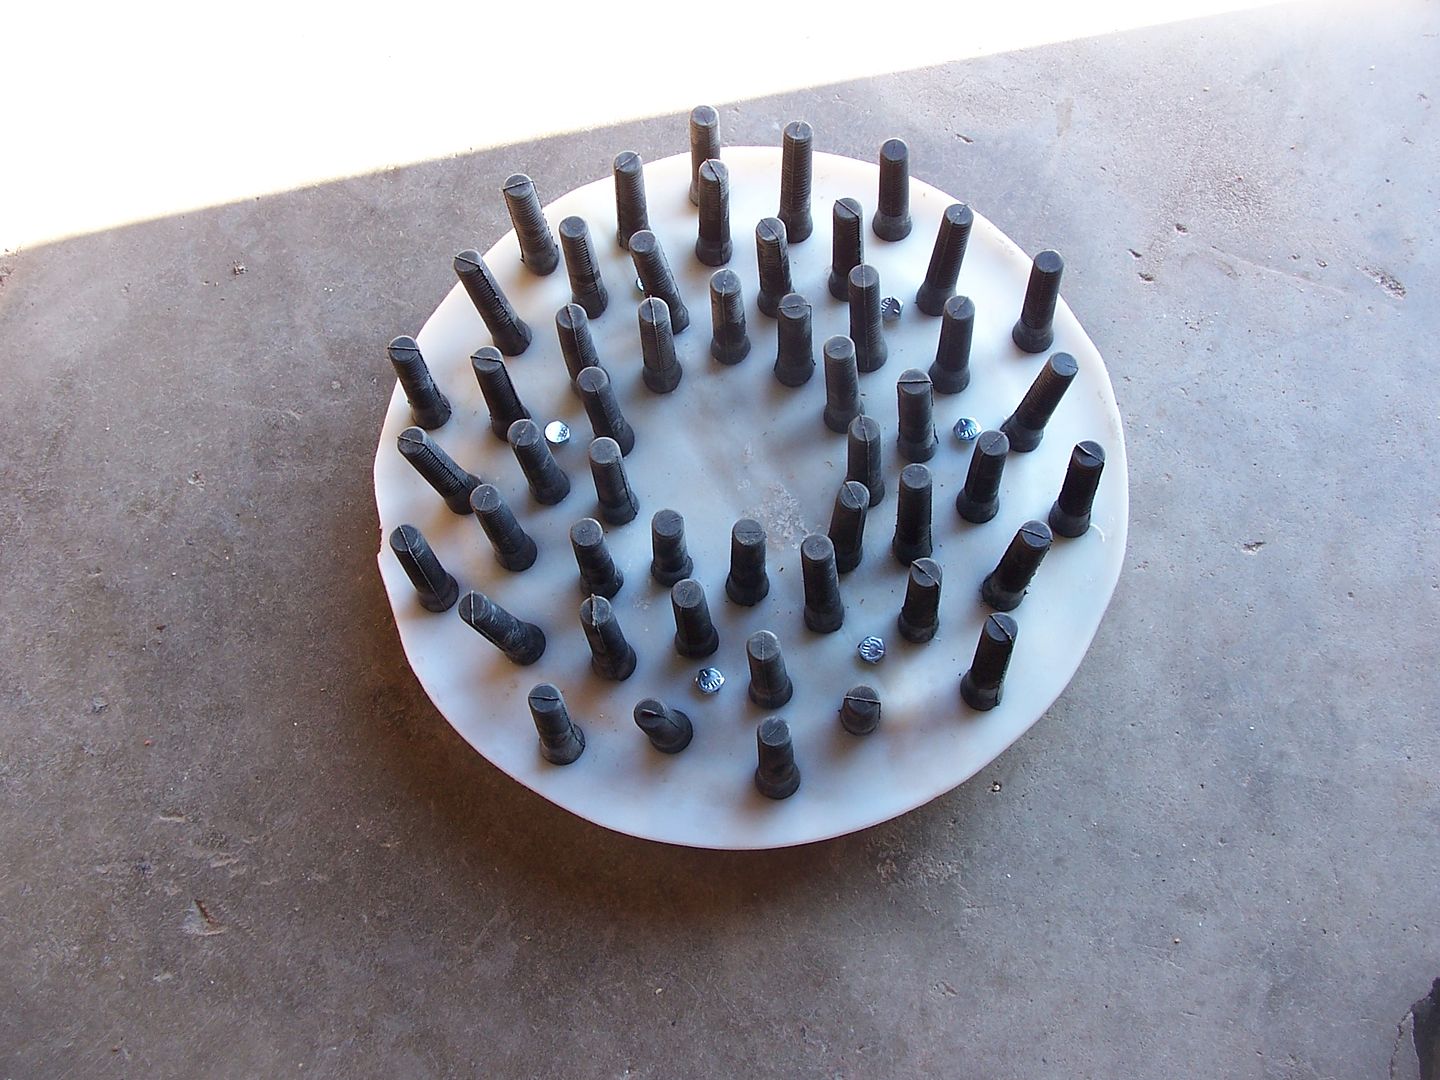
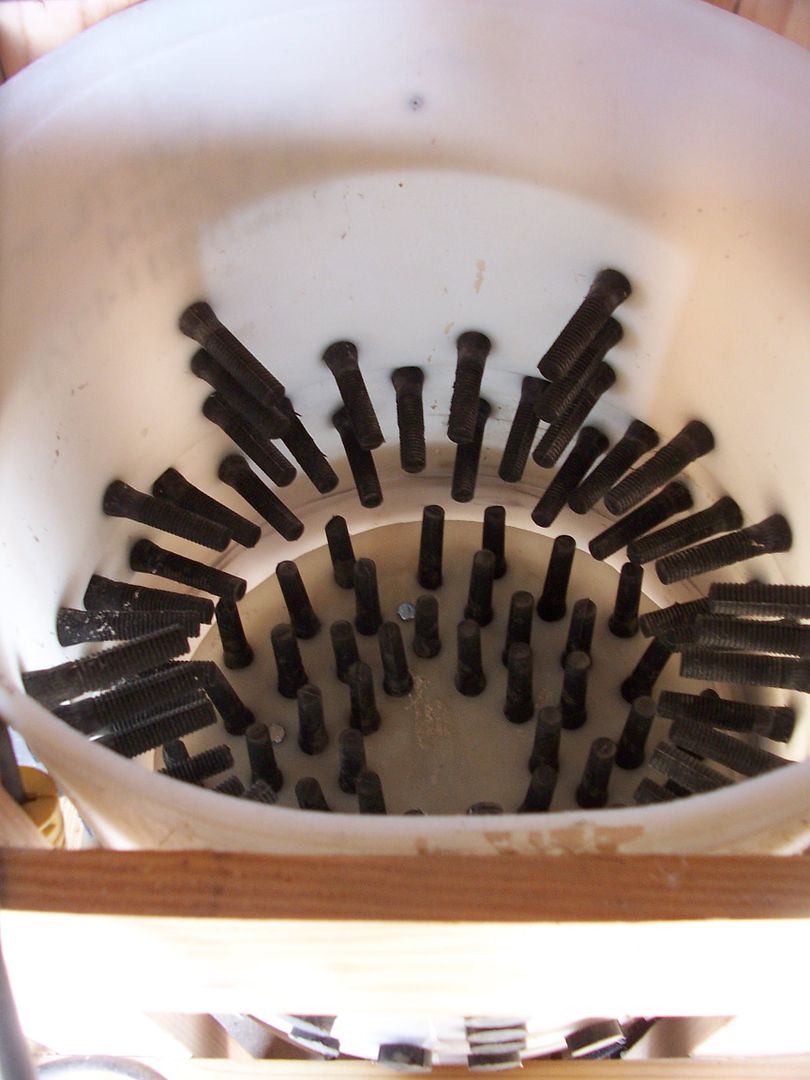
Started inserting the "fingers"...
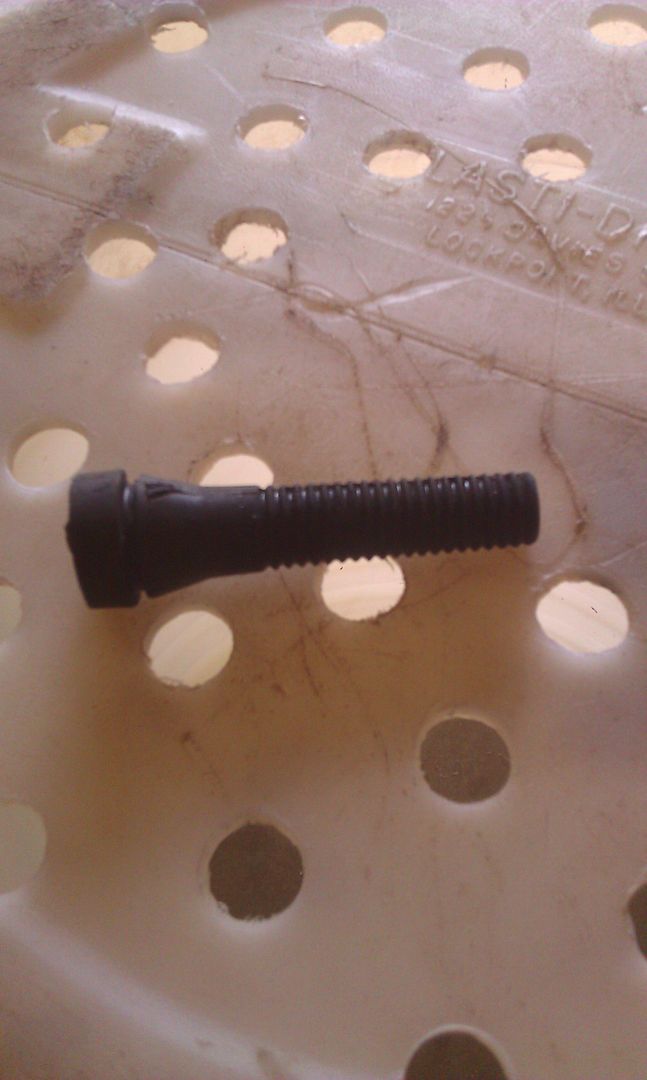
Inserted the rubber "fingers" . They were easier to pull through the holes when oiled. I used vegetable cooking spray. ( I could have used WD 40 but the cooking spray came to mind first. lol )

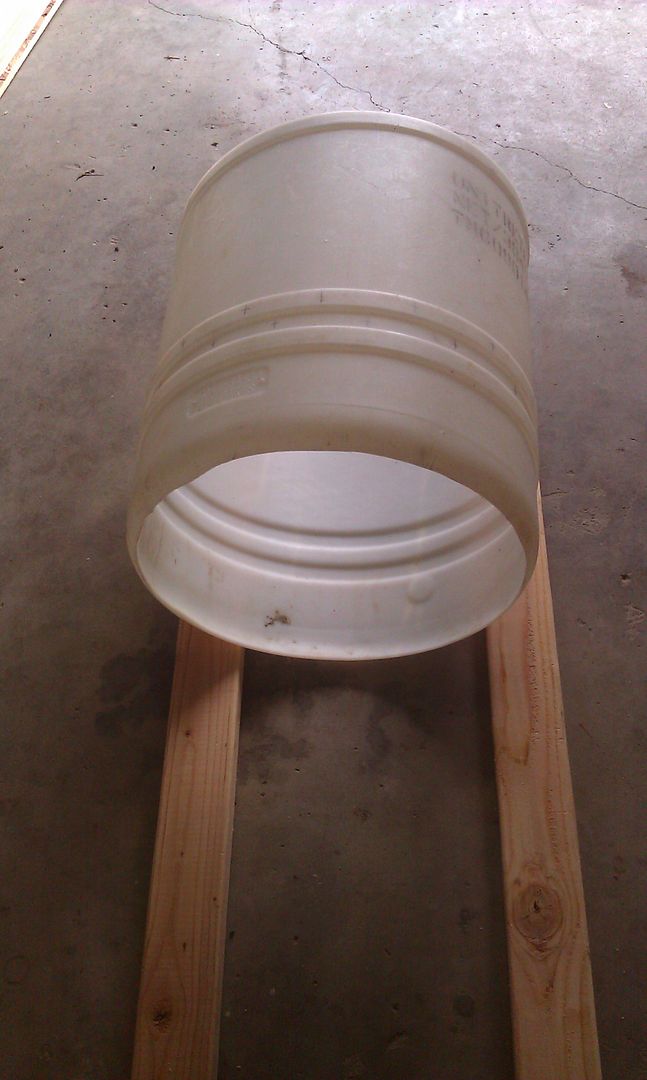
Cut the top of the barrel off to make the barrel the depth that I wanted for the plucker. I just used a measurement that was comfy for me to be able to reach into the barrel and be able to reach the bottom.
Marked the side of the barrel where I wanted to drill holes for more "fingers"...

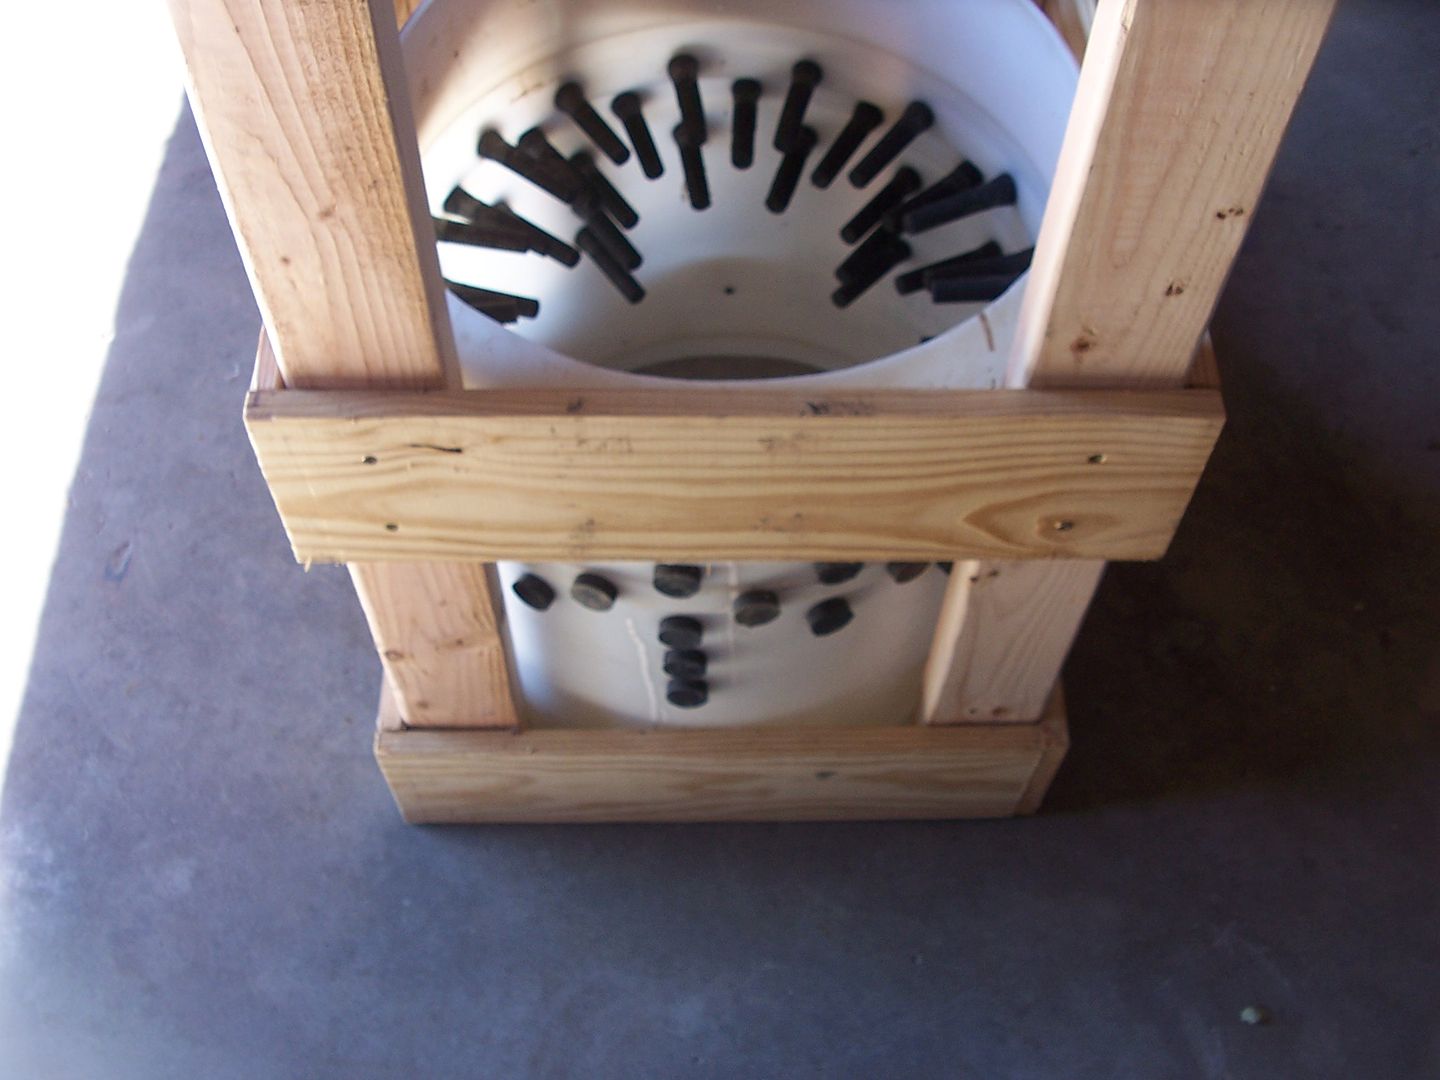
Built a 2x4 frame and attached the barrel with screws... (the plucker is turned upside down in picture)

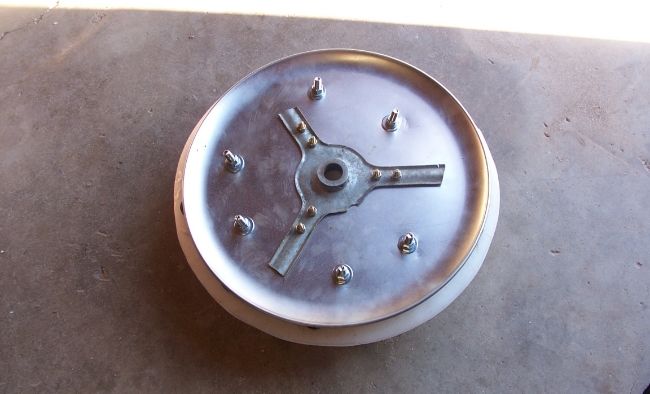
Reinforced the bottom of the barrel by attaching a pizza pan.
Also attached one bracket from the swamp cooler to the pizza pan....
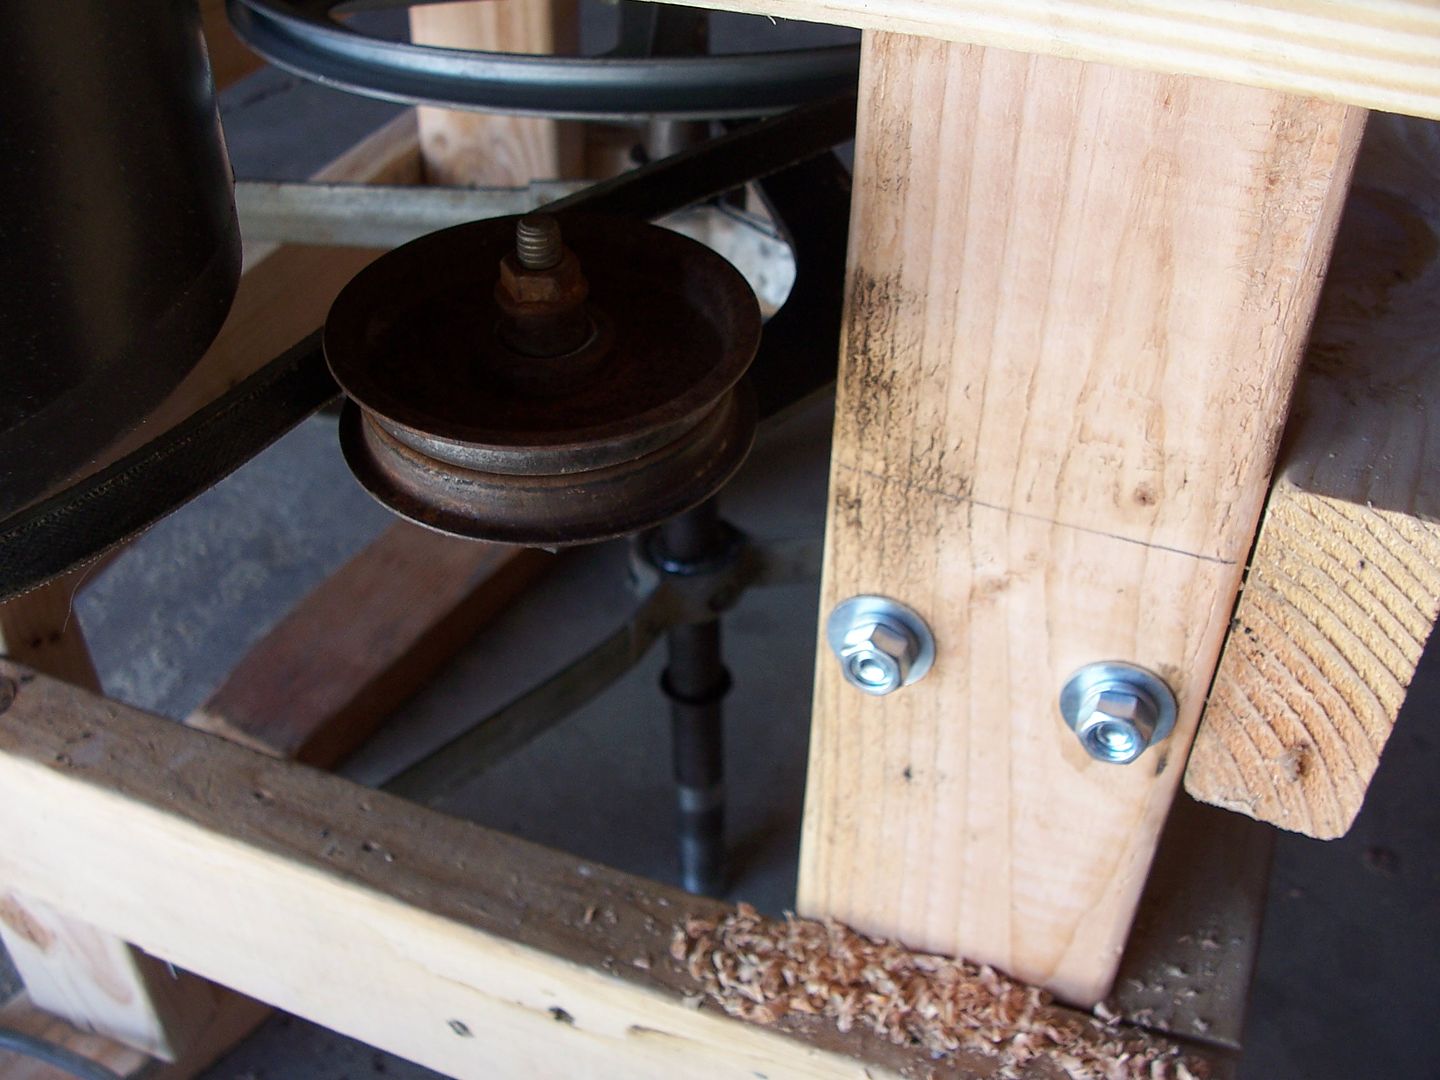
Next came the air compressor motor.... (still have the plucker upside down)
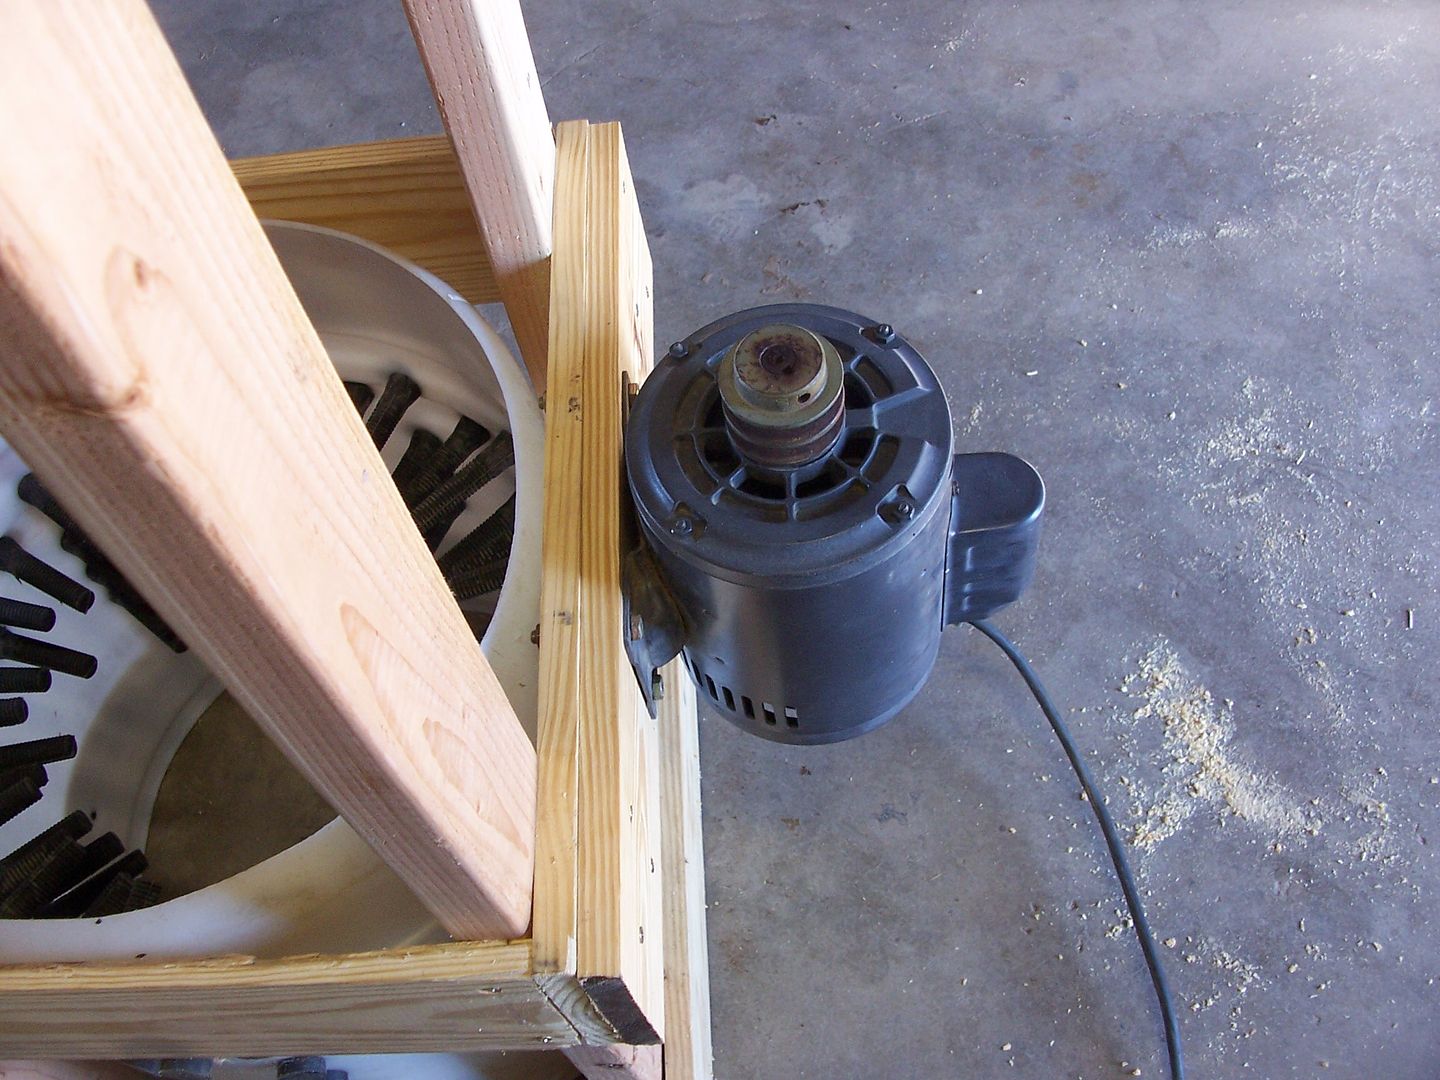
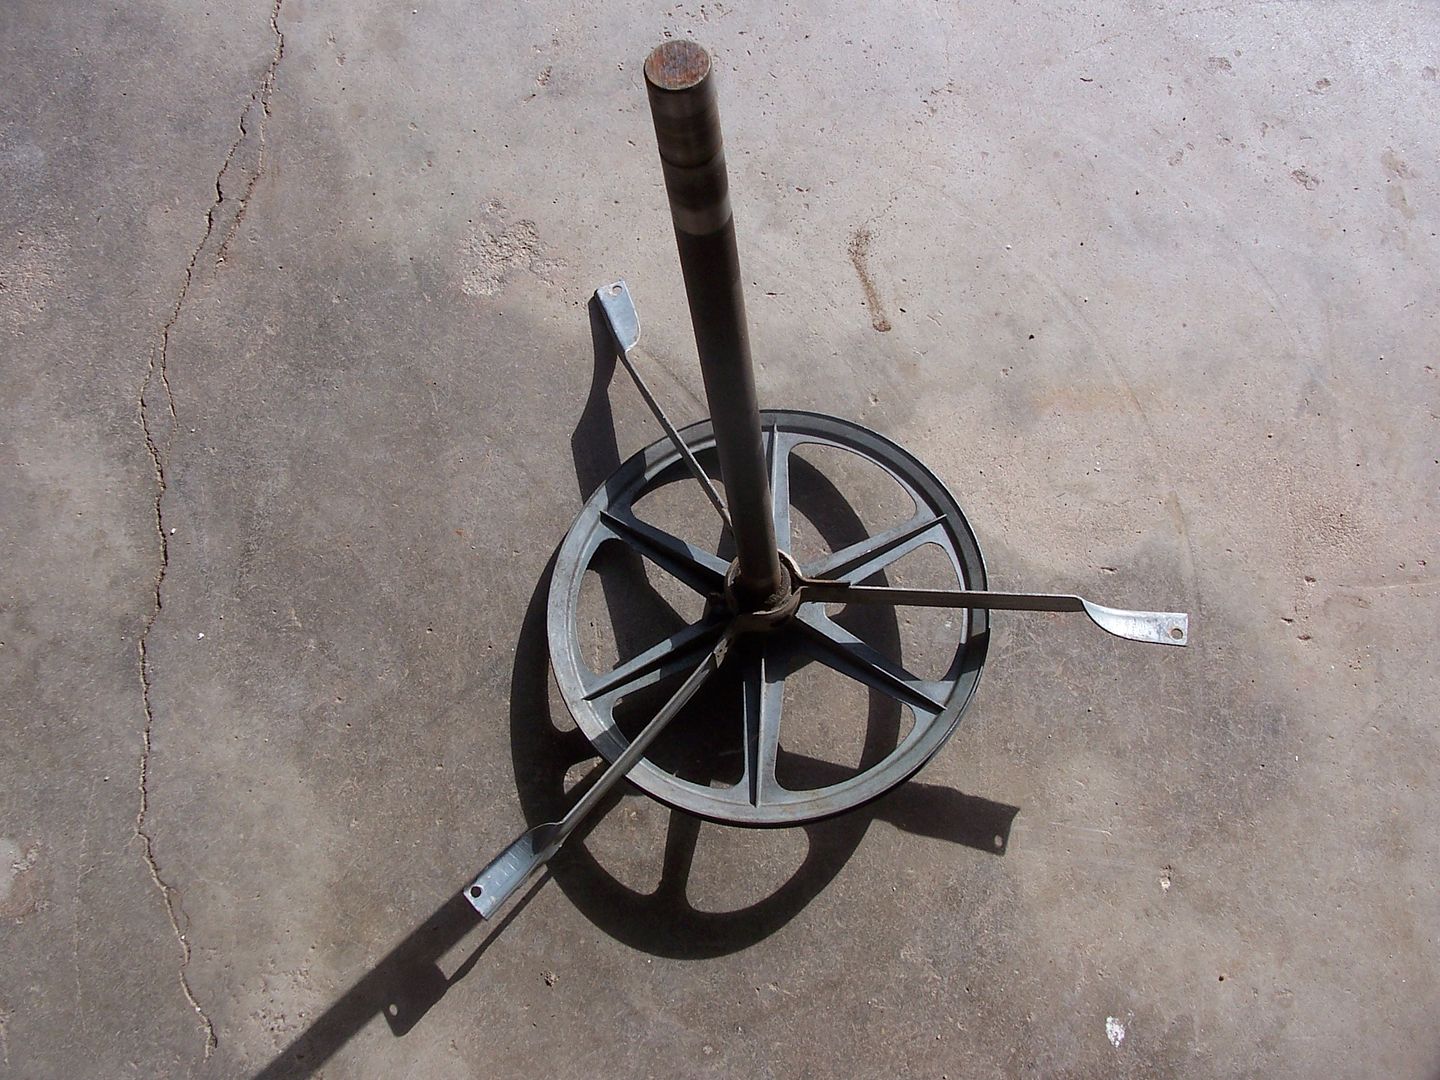
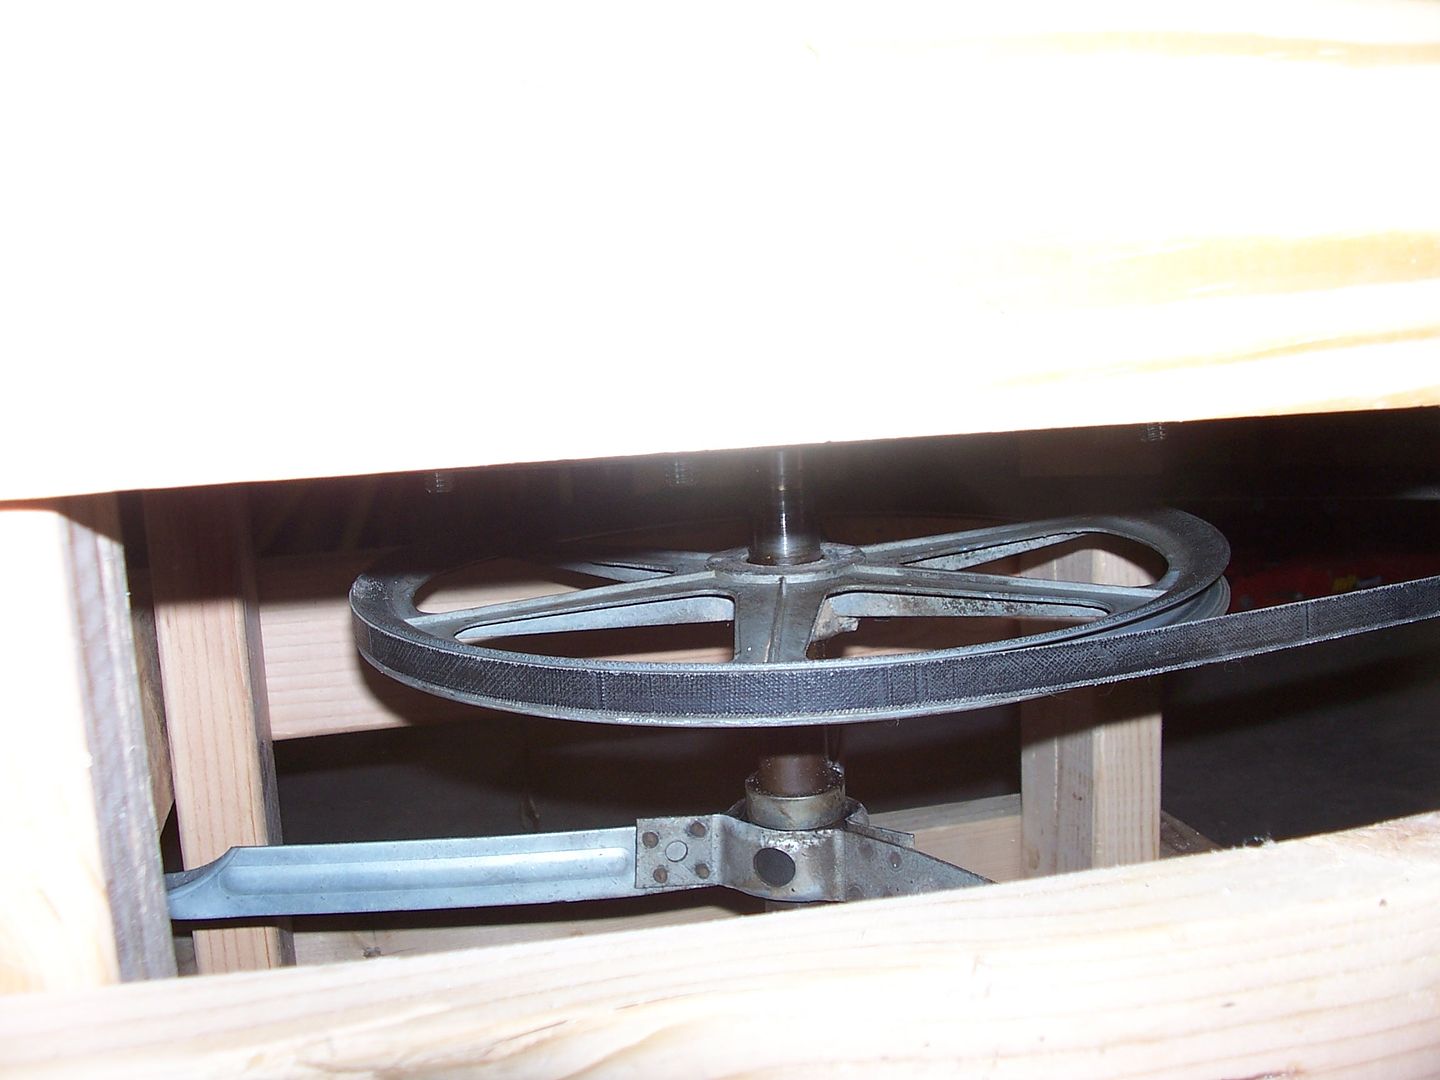
The swamp cooler pulley, bracket and shaft... (one bracket is not pictured)
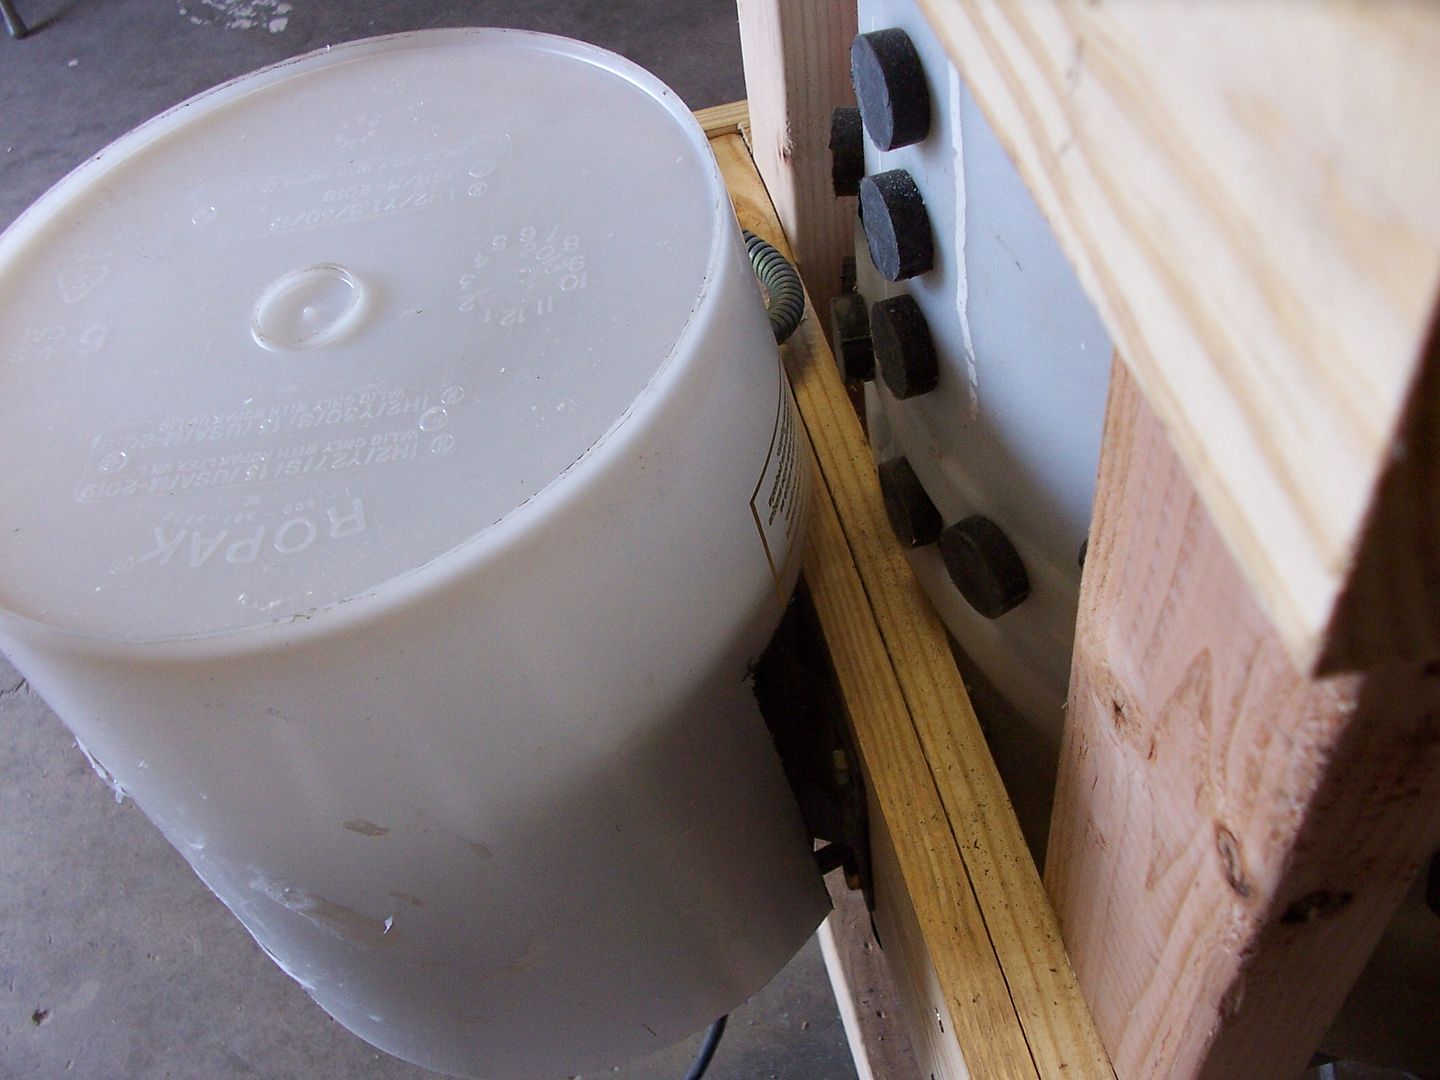
Attached the bottom of the barrel to the shaft.....
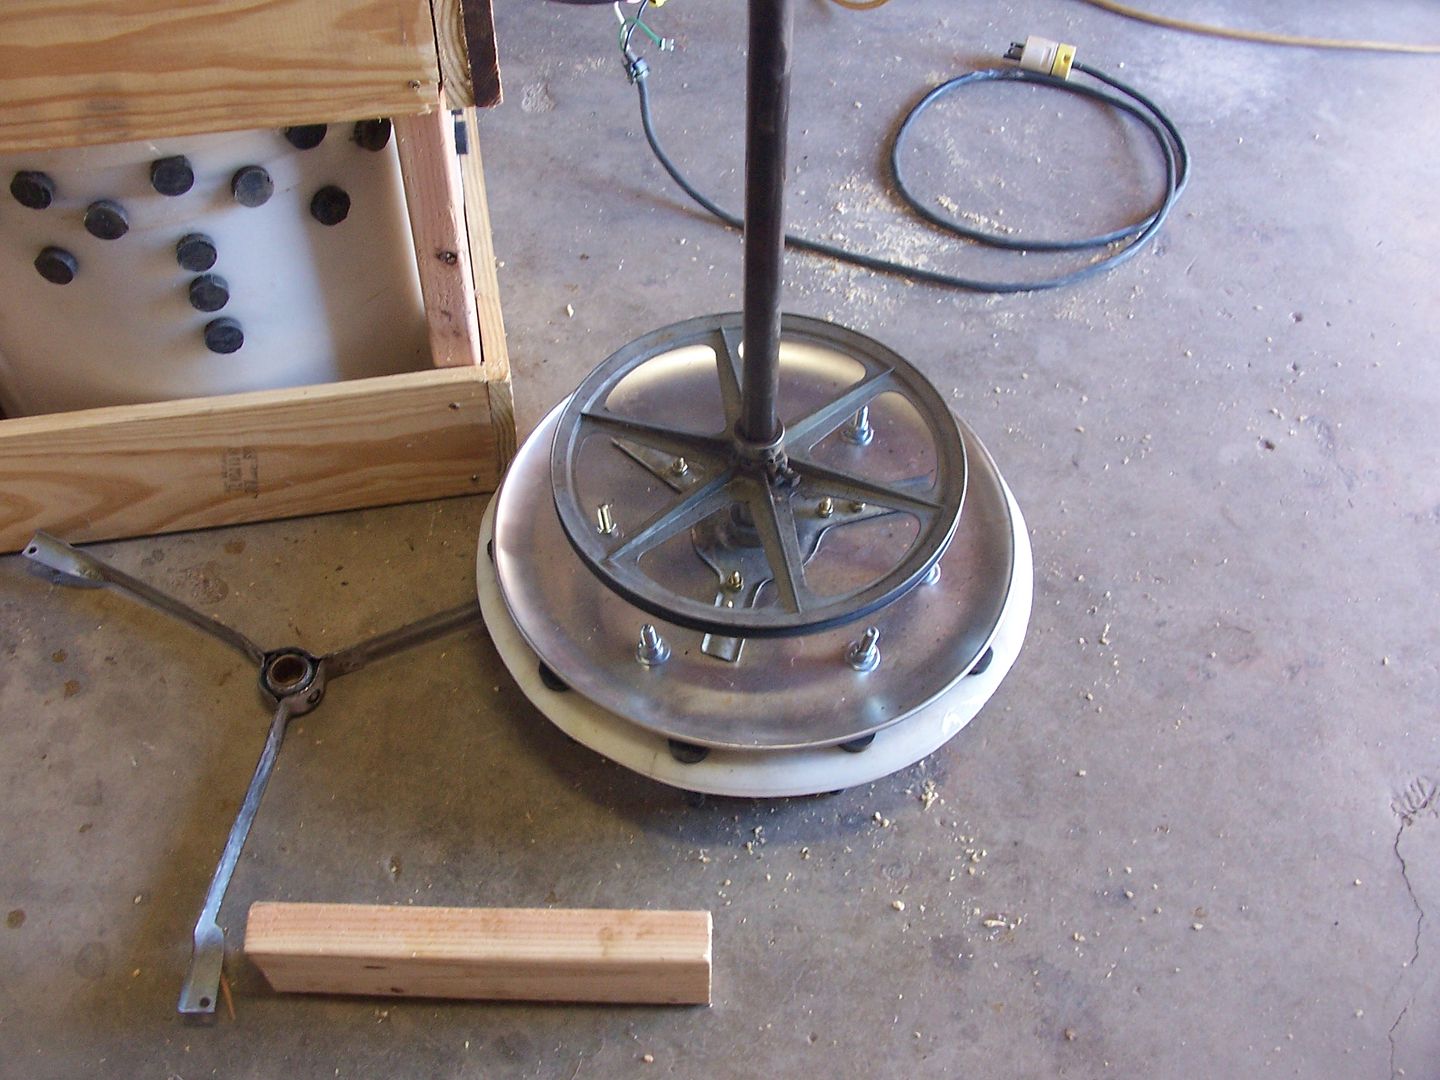
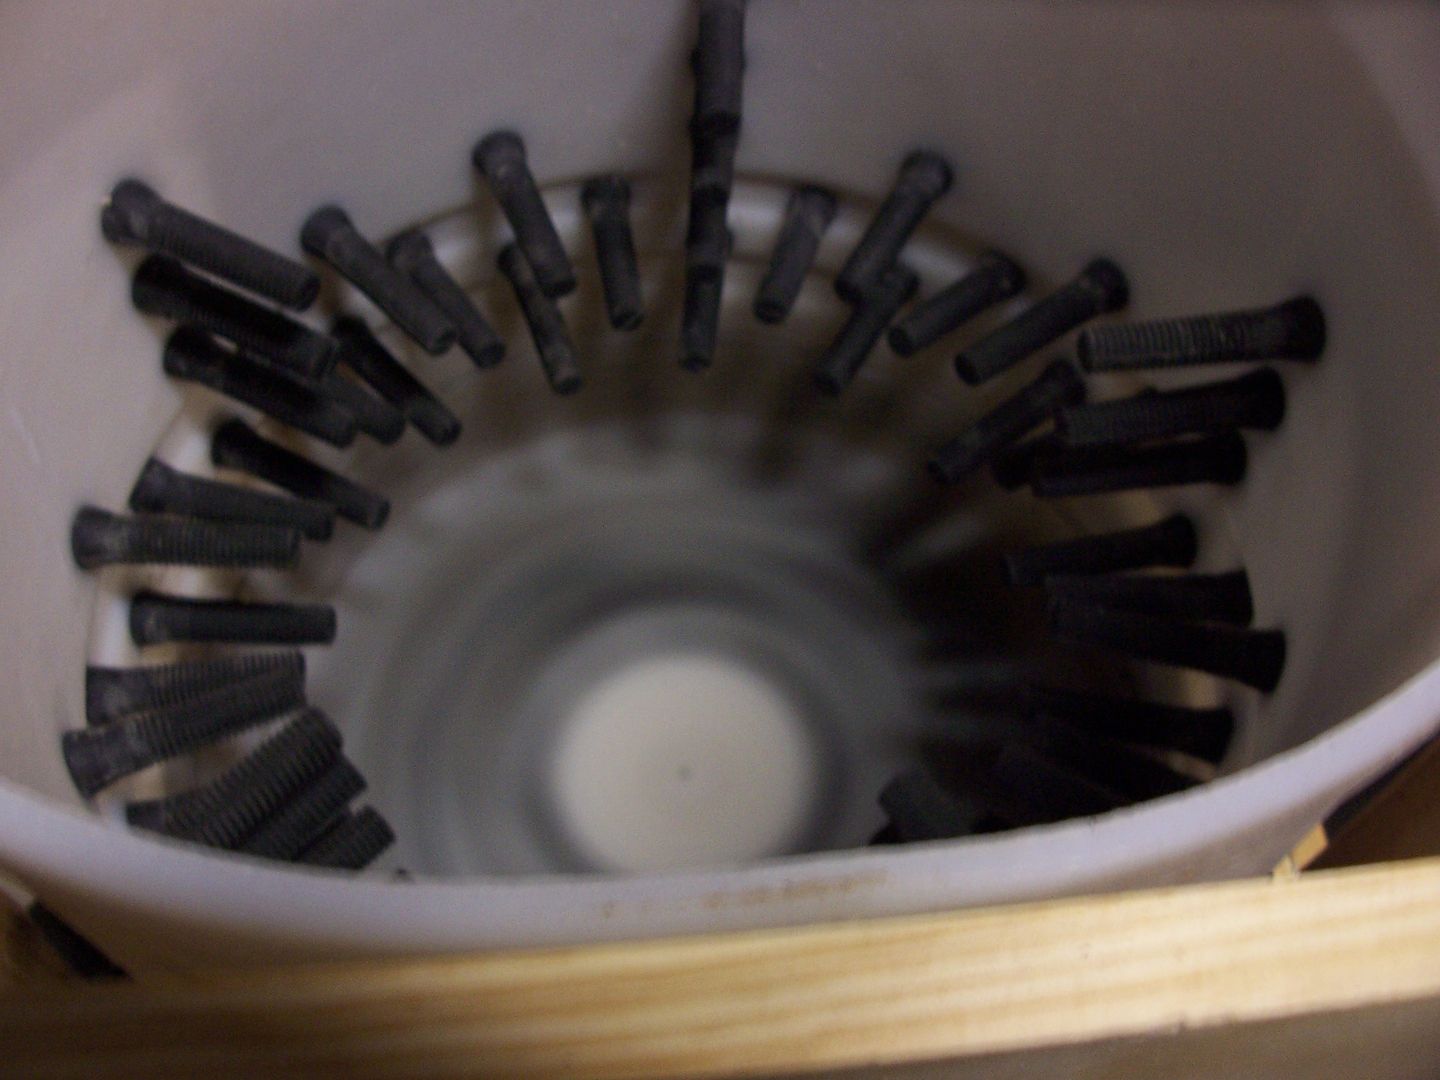
Lining up the pulley with the motor... The bottom of the barrel needs to be inside of the barrel about 1". Space is left between the bottom of the barrel and the side so the water and feathers can pass through and out.
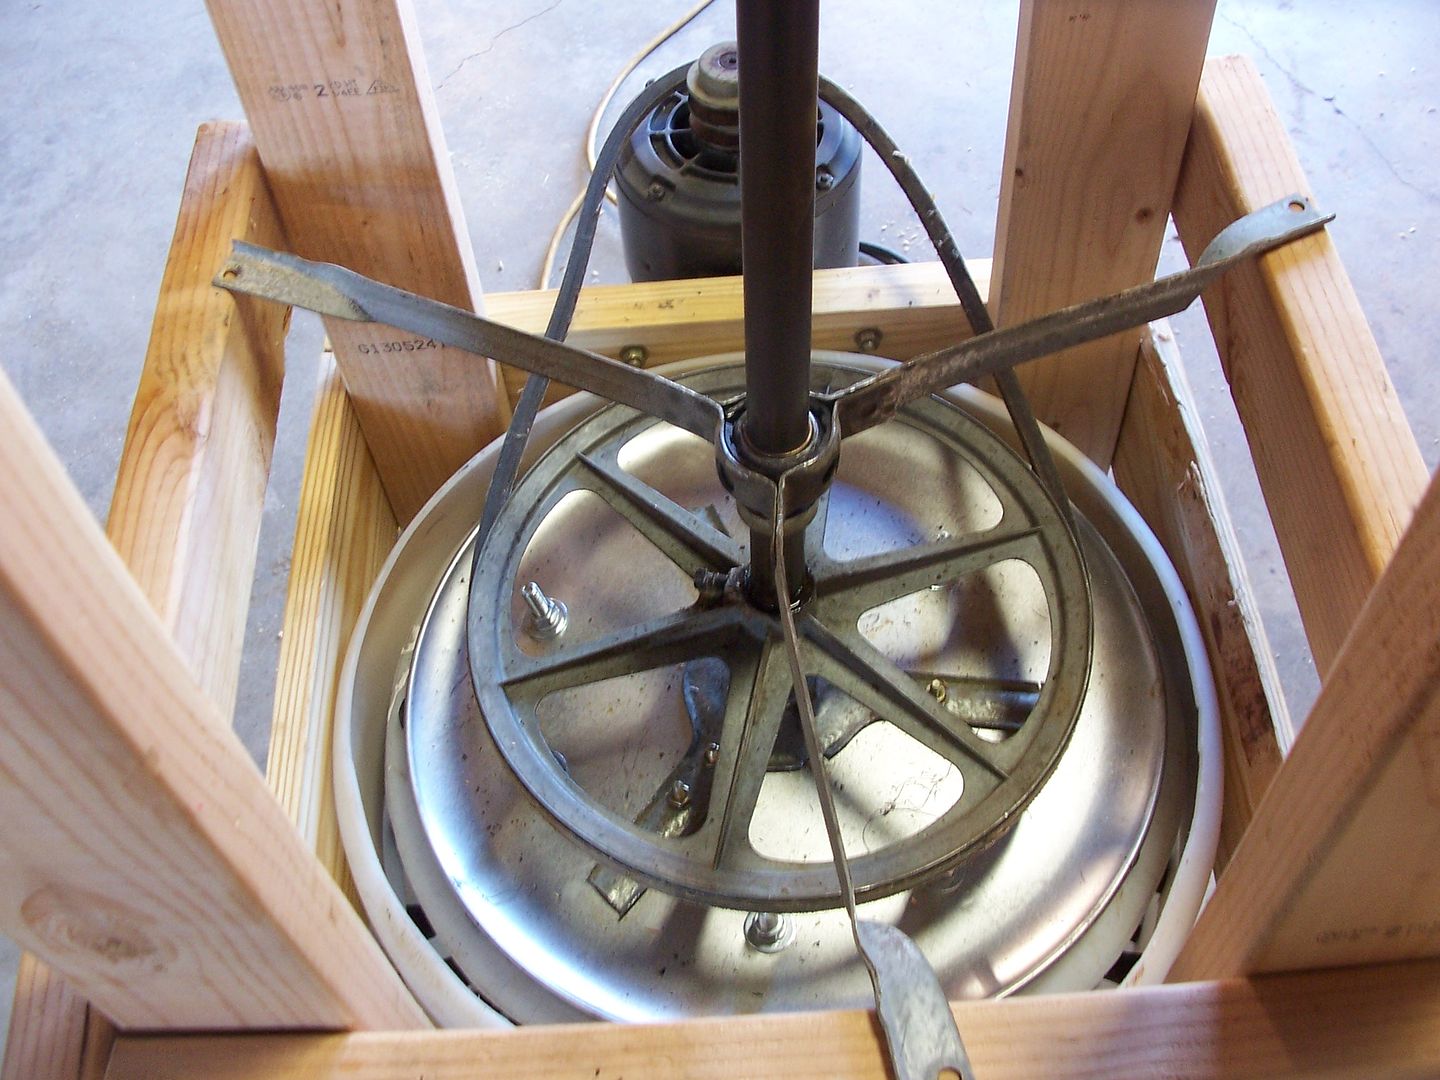
Attached a second bracket to keep the shaft steady and straight...
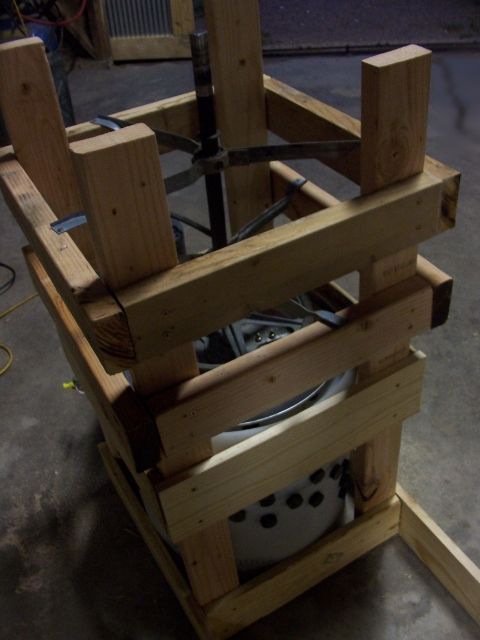
Time to turn the plucker right side up....

Add a switch to the motor...
not shown, I ended up replacing the wire from the motor to the switch.
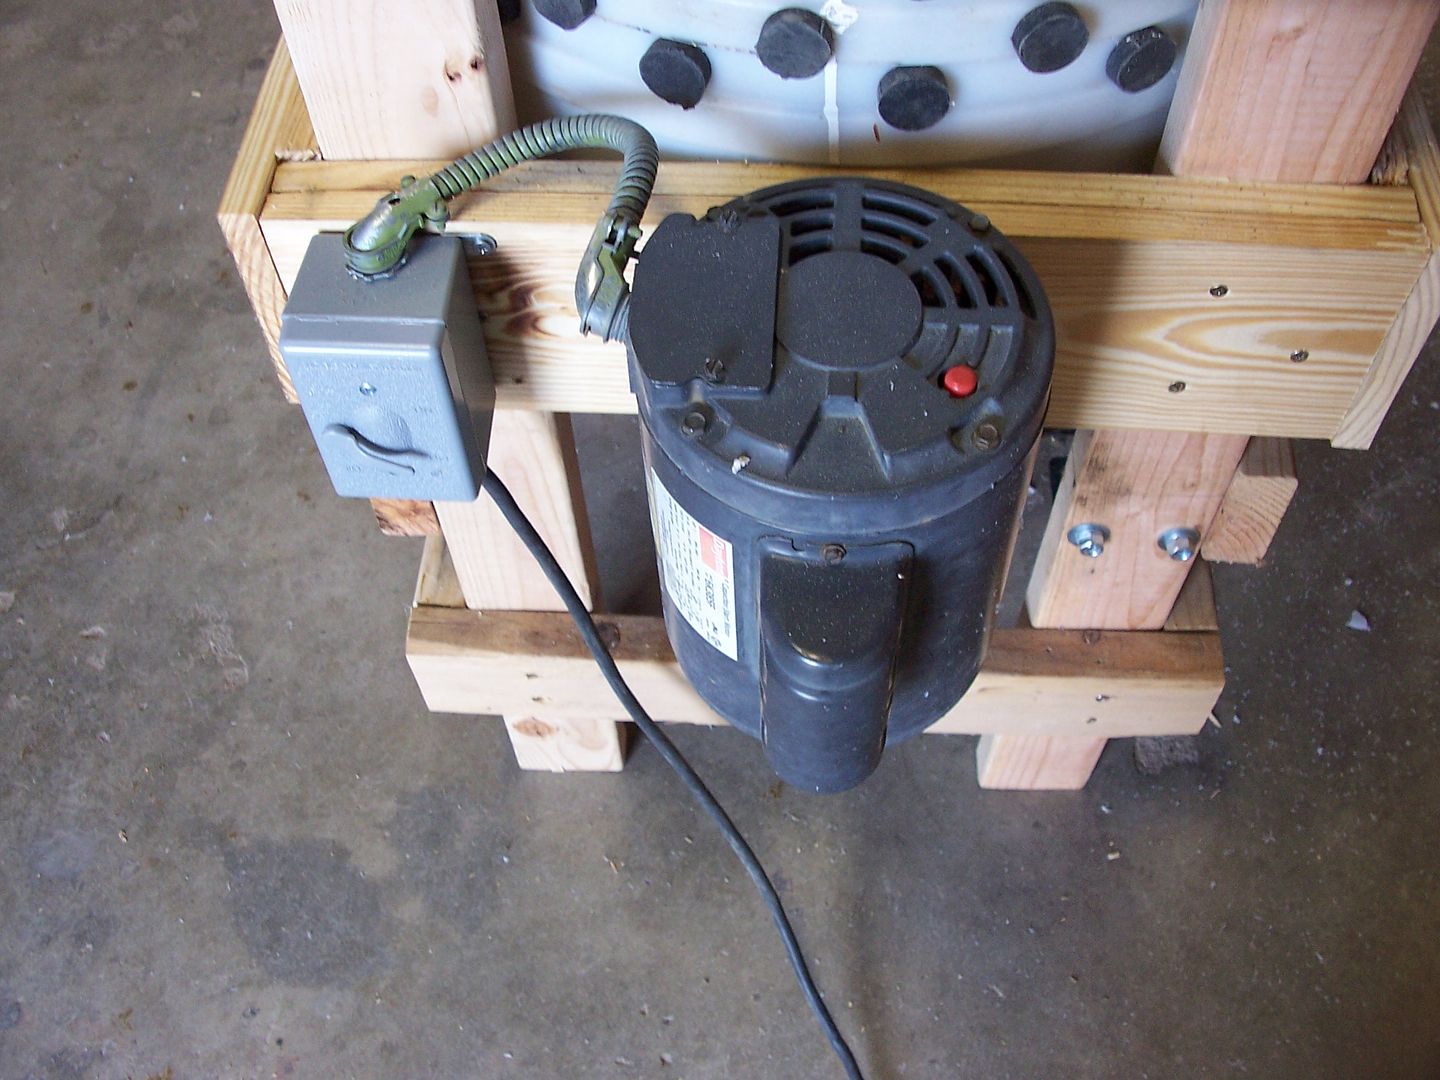
cut a plastic bucket to fit over the motor...
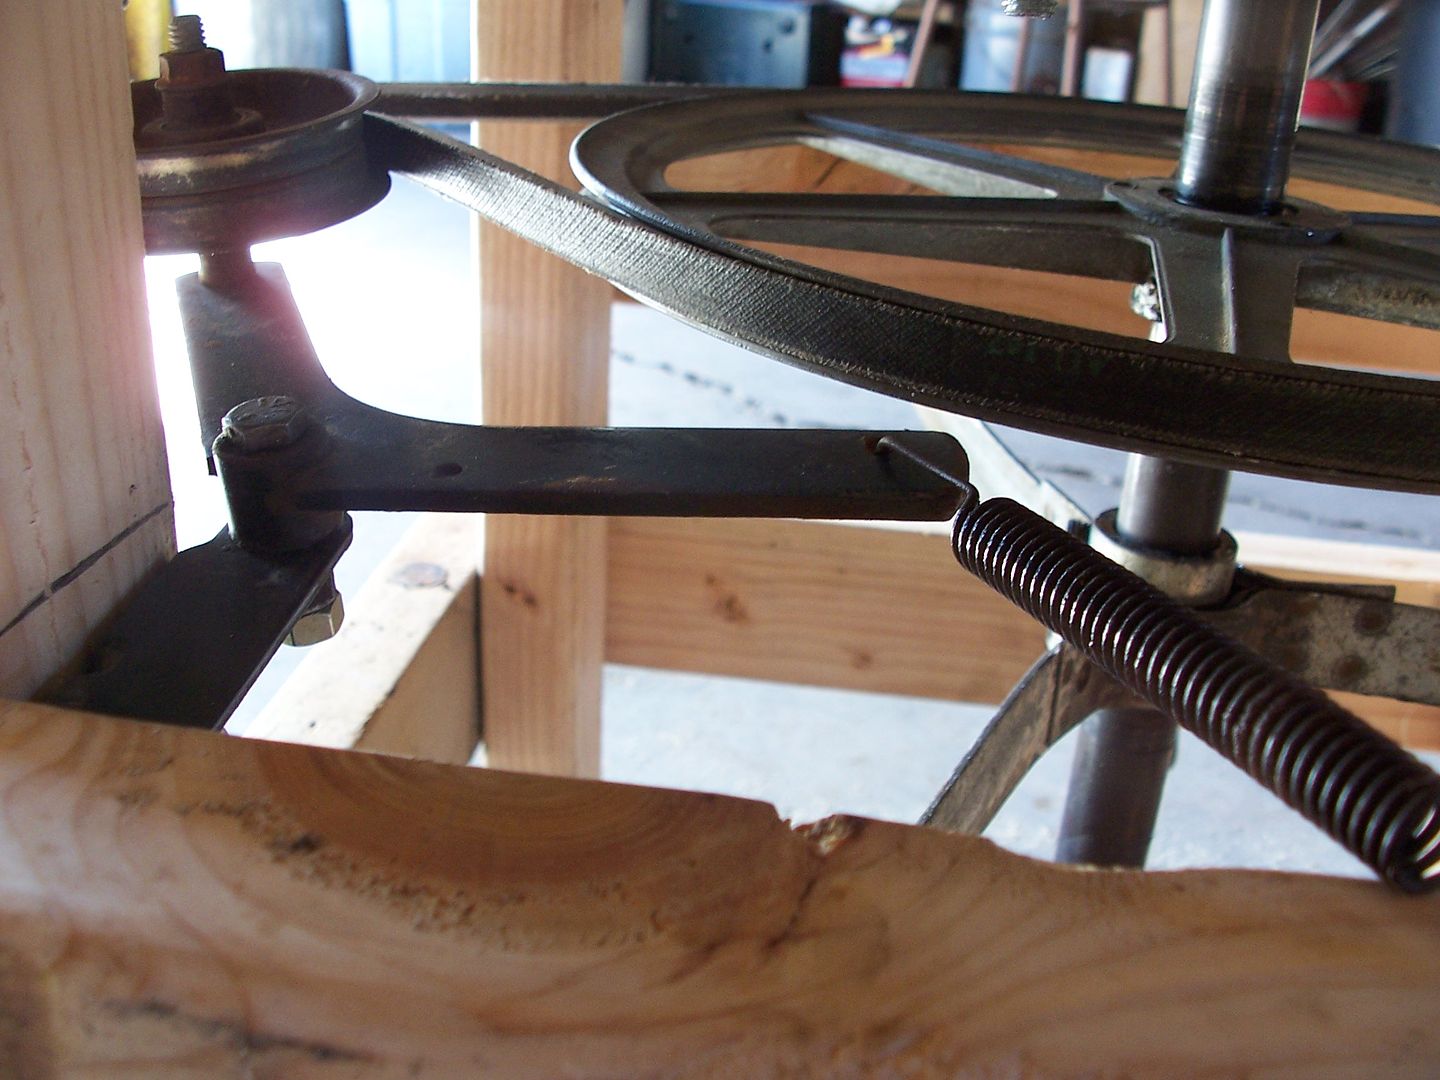
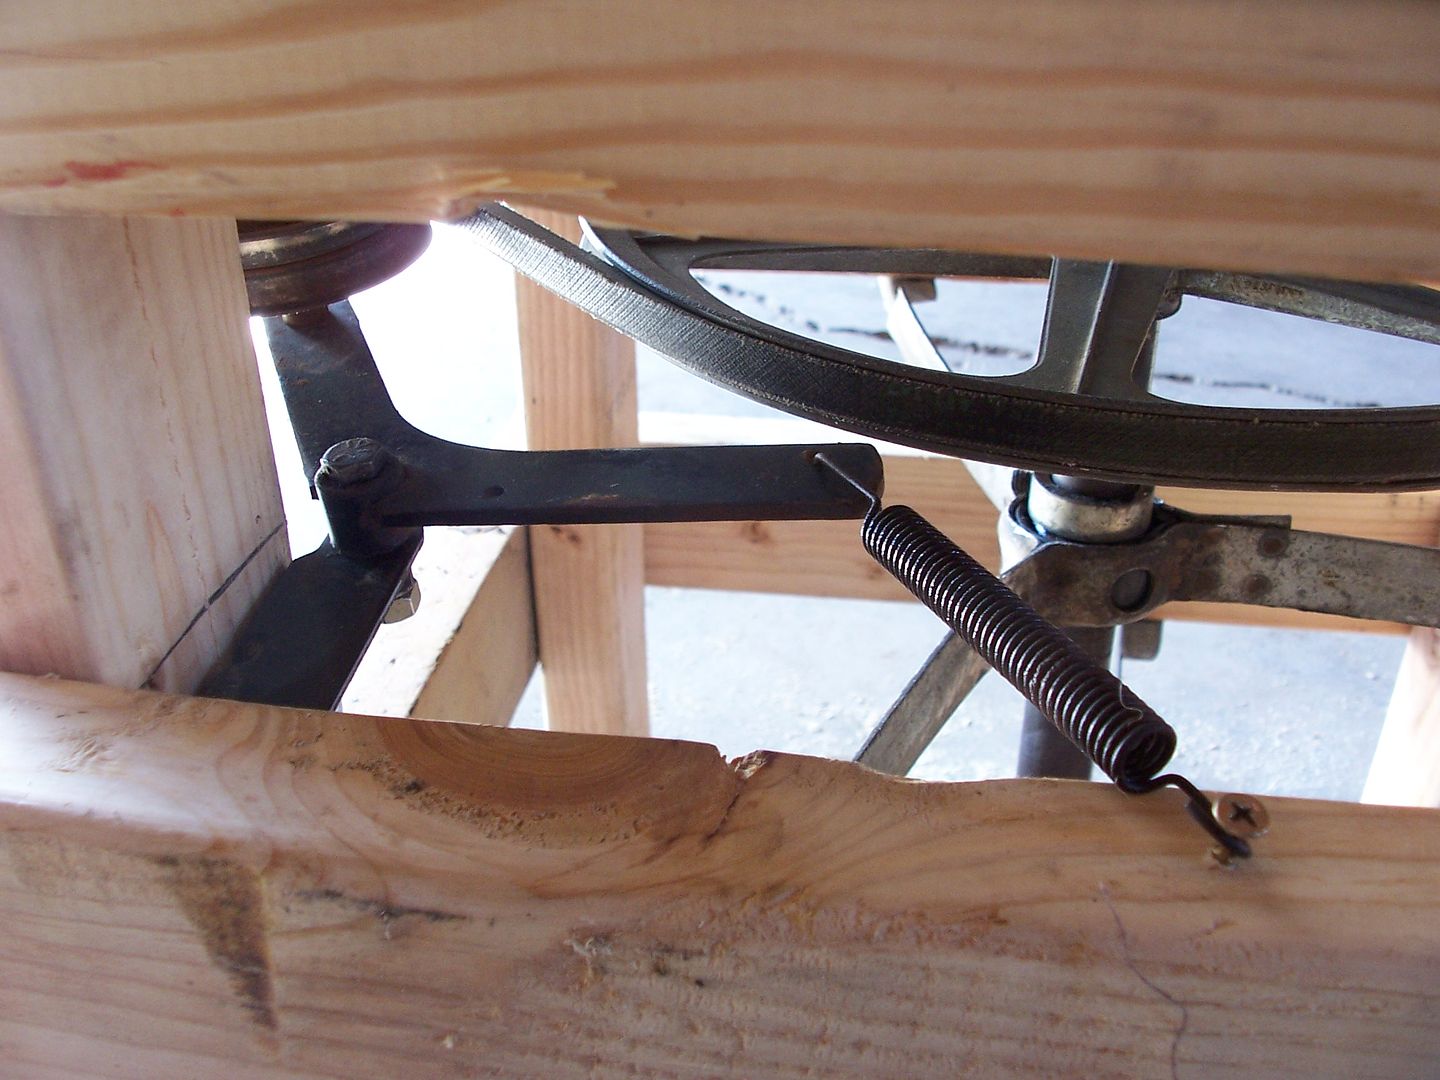
The idler pulley from the old air compressor...
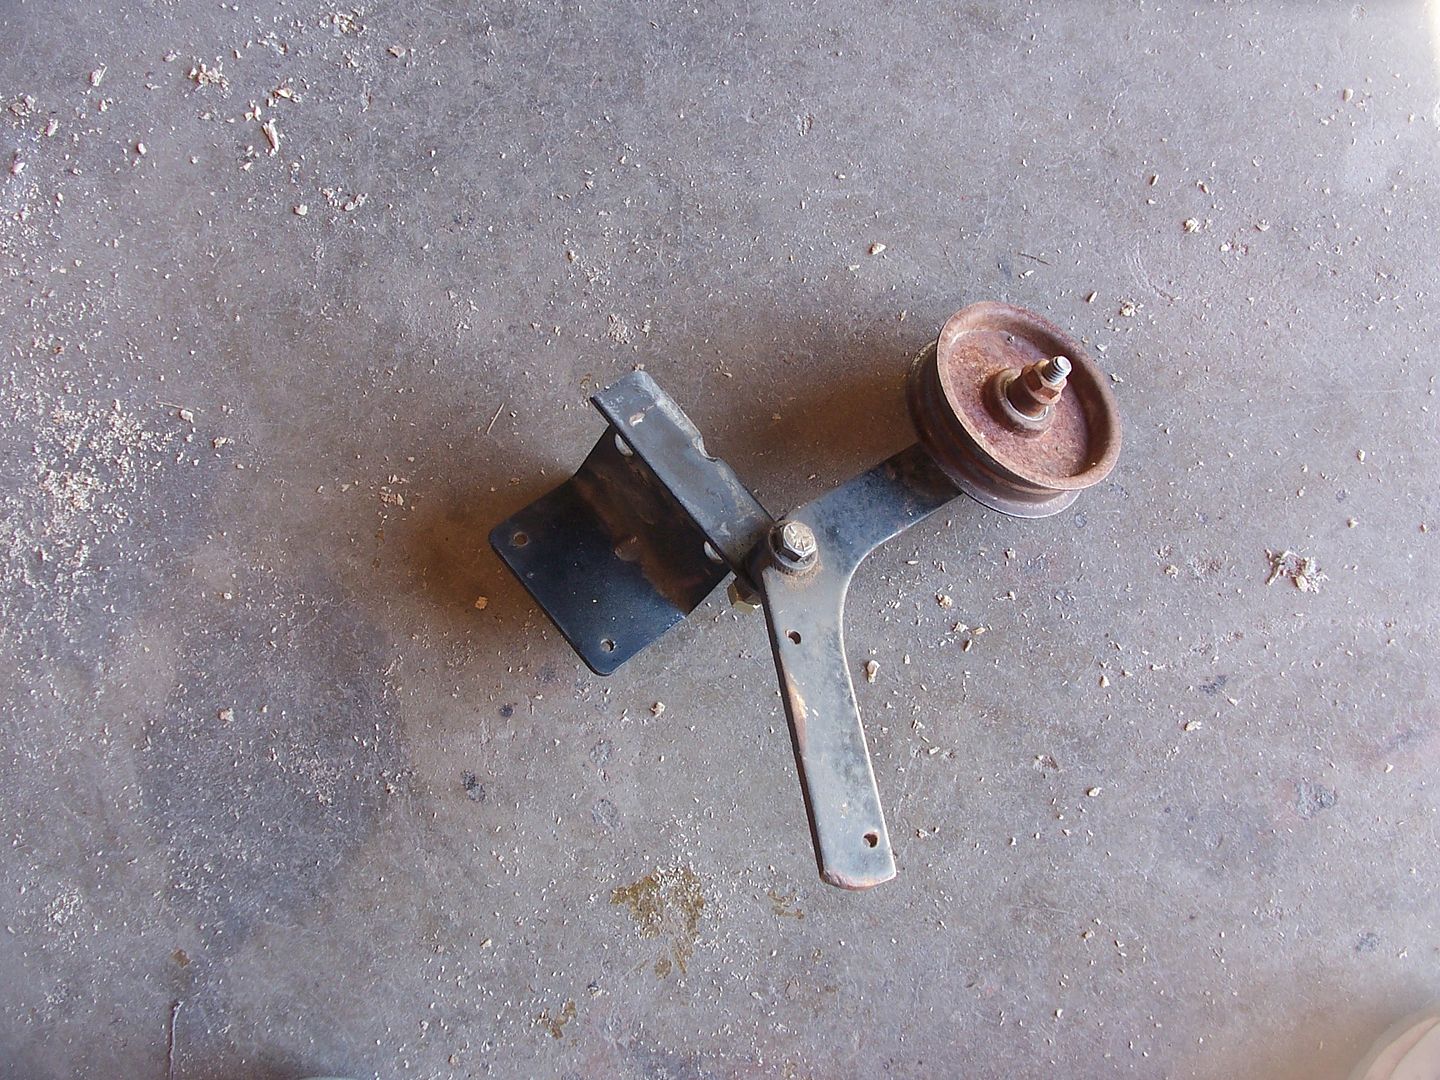
The belt and mounting the idler pulley...
The pulley keeps the belt tight...
Ready for action...

The barrel is stationary, the bottom spins...
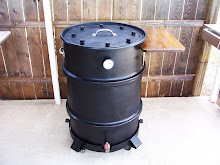
The chicken plucker...

The plucker works great. I haven't decided if I want to add a table to the top. I left the boards uncut until I decide.
Also am thinking about adding wheels. I used a dolly to move it around, but wheels would be kind of handy.
I was able to clean chickens in record time with this thing. Should have built one a long time ago. :)


23 comments:
Ms. Jeanie
All I've got to say is YOU ROCK!!!!!!!!!! Nuff said.
Chris G.
Chris thank you!! You've made my day. :)
This thing works really well. It will remove the feathers from a bird in just a few minutes. So much faster than doing it by hand.
Wish I would have built one of these a long time ago. :)
Hope you are having a nice Monday! Thanks again Chris. :)
Can you describe the operation of this? The types I"ve seen before have a rotating drum that you hold the bird against. Do you just drop it inside of this, or do you hold it? What purpose do the fingers on the bucket serve, if they don't rotate?
Hi KJ,
The bottom of the plucker rotates but the sides are stationary. After dipping the chicken in hot water to loosen the feathers, I drop it inside of the barrel. The fingers remove the feathers as the chicken flops and rolls around.
I hold a water hose over the bucket and spray the feathers as they come off. Then they wash out through the bottom space I left between the barrel side and bottom plate.
The force of the chicken flopping around seems to be enough to make the side fingers work. Who ever came up with this design must have figured it out. :)
It really saves a lot of time.
I tried to snap pics when I used it, just got a couple of shots. Hope to post them soon.
There are several good videos online showing how they work.
Hope this helps KJ! Thanks for stopping by. :)
Fantastic! I have bookmarked this and will probably print it out for hubby to build when we are finally able to get our own chickens. :-)
Glad to have your 'seal' of approval on it. ;-)
Add a torch and you can take care of the pin feathers at the same time ;)
Any videos of it in action?
Jeanie
Just wonderin'......
Do the hens known that you have this in your arsenal? I'll bet if you set it out by the coop, egg production will increase...;) Nice job!
We are getting our first rain of the season. We really need it, the lake, ponds and streams are really low, AND I'm running out of hay for the "horns" We need grass soon!
Have a good week and Happy Turkey day!
Hot Dang! Is there anything you can't do?
Linda Thanks! The only thing I would change on it is lower the motor a bit. I wouldn't mind building a "collection box" (not sure what to call it) to catch the feathers and channel them out one side of the plucker.
Hope you have good luck with it! :)
lol Bill that would be handy. :)
No video of it in action. I need to figure out how to post videos.
I only snapped a couple of pictures. Once the chicken cleaning got started, it moved along pretty fast. I was elbow deep in "icky" stuff. :)
Thanks Bill!
lol Rick they know! I kept it out of sight while using it though. :)
Glad to hear you're getting some rain! That's great news.
Thanks Rick, hope you all have a great T-Day too. :)
Ole Smokey Thanks! :) There are too many things I can't do to list. Doesn't stop me from trying though. lol
Hope you have a great Thanksgiving! :)
Jeanie, you are AMAZING!!
I remember helping my uncle Richie on his farm in Pulaski Wisconsin, hand picking feathers from yardbirds in a bucket of hot water... one feather at a time... tedious work, break your back for a tasty chicken leg.
This is cool stuff Jeanie! Have a GREAT Turkey Day girl!
Jeanie.....you rock. That is all.
Jazzcat thanks! You know how much work it is to pluck chickens then! This plucker just takes a few minutes. Such a time saver!
Hope all is well with you, have a great Thanksgiving! :)
Chris Thanks! :)
Happy Thanksgiving to you and family!
Thank you so much for sharing this!!! I will have to make one for my parents. They like to raise their own and always have to do it with their hands. My dad works 6 days a week and his day off sometimes spent just for that. It breaks my heart to see them work so hard to prepare a meal whenever I come to visit. Thanks again and God bless you!!
Thuy, thank you!
These chicken pluckers save so much time. I hope you have great luck building yours. Thank you for stopping by!
Best wishes to you and your parents!
I'm going to attempt to do this! Yours is the best explanation to my way of thinking, so far. I am comfortable with construction, but am baffled by the motor type and pulley sizing. I've seen lots of discussions, and I'm pretty smart, but none that make sense in my particular view. Since the rest of your post really makes sense, I was hoping some guidance on the motor and pulleys. And bearings. What kind did you use? I think I can find a neighbor with a salvageable compressor. The pulley, shaft and brackets you said were from an old swamp cooler. What the heck is that? Clue me in please. I want a tub plucker, but I like my money in my own pocket, so any help understanding good motor types and possible sources of salvage would be AWESOME. I'm actually okay with the all of this except understanding the motor types and recognizing a good one for this purpose. And that swamp cooler thing. Thank you!
Thank you Tammy! The plucker saves so much time. Wish I would have built mine a long time ago. :)
A swamp cooler is one of those old window air conditioners that cool with water evaporation. You either spray the whole cooler down with a garden hose or some are set up with their own water system. I think you can google "swamp cooler" for a pic of one.
You need a small electric motor to turn the bottom of the plucker. I went with 1 horsepower because that's what I had on hand. I also wanted it powerful enough to use on larger birds.
The motor will spin a shaft fairly fast... faster than you want the bottom of the plucker to turn. I used the large round pulley from the swamp cooler to slow down the rpms.
I lucked out and the shaft and pulley from the cooler already had bearings.
The small idler pulley is spring loaded and presses right up against the pulley belt, keeping it tight.
I've heard of people using smaller motors, 3/4 hp, but have no idea if they work well or not.
This motor was from an old air compressor, I think swimming pool pump motors might work... new motors are so expensive!!
One thing that helped me out... I let friends know to keep an eye out for what I needed. You might ask around for that swamp cooler.
Also, You might keep an eye on craigslist.
Not sure if this helps!
Hope you have great luck Tammy!
How far apart did you space the fingers on the outside of the drum vertical and horizontal
Hi Iam, They aren't exact. I eyeballed them when I marked and drilled the holes for the fingers.
They are about 3 inches apart horizontally and vertically. I followed the ribbing on the barrel and just spaced them along that.
Hope it makes sense! As long as there are no huge gaps between the fingers, they will work fine.
Good luck with your build!
Hi, Jeanie.
I am so going to build this. I can't find what size barrel you used? It looks smaller than a 55 gallon drum for sure. Nice work.
Jennie
Post a Comment