Search Feature

Sunday, September 16, 2007

Cooking Whole Hogs in an Underground Pit

Click here for updated underground pig pictures


The method of cooking meat in an underground pit has been around for years. The meat turns out so tender and juicy with just a small amount of effort. There is no need to tend the fire, turn the food, add wood or coals. The underground pit does all of the work.

You can use this method to cook anything from whole hogs, venison quarters, turkeys, briskets, to pots of beans. You can even do them all at once. You just need a hole in the ground large enough to hold them.

When doing a large hog, (this one was over 200lbs)...I start burning the wood at about 7 PM and try to get the hog in the ground by 10PM.
After the hog is buried, there is nothing left to do until morning. About 10 AM check the meat.

Smaller hogs take anywhere from 8 to 12 hours.
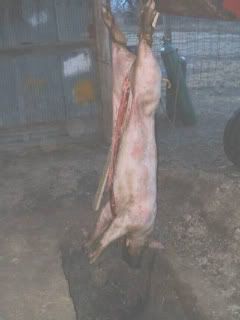

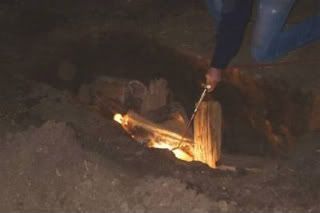
You need to burn enough wood to make a 6 to 8 inch bed of hot coals, even 10 inches is good for a large hog. This usually takes 2 to 3 hours. (It's a party in itself!)

After you have a nice thick bed of hot coals, place a sheet of tin on top......the seasoned and wrapped meat goes on the sheet of tin.

A word about tin........do not used galvanized. If you HAVE to use galvanized, burn it with a blow torch or on a fire before using.
Same with chicken wire, some folks say that the heat is not high enough to give off harmful fumes, but you can burn the tin and wire with a blow torch to play it safe.

Also, hang onto your tin for the next cookout, you can use it over and over.


The old timers used wet burlap to wrap meat. It's getting harder to find around here, so I use foil.
I like to season the meat with my favorite dry rub, also I like to place apples, onions and brown sugar in the cavity of the hog.....it adds so much flavor. You can add anything you like.

After the meat is seasoned, wrap it in wet burlap OR foil, also use a small amount of chicken wire. The wire helps hold the tender meat on the bone and also helps when it's time to remove the hog from the pit.
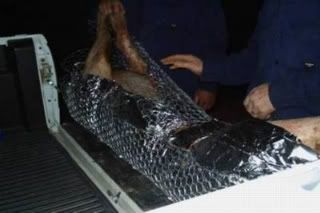


A large sheet of tin is placed over the hot coals, the wrapped hog is placed on top of tin.
Another sheet of tin is placed over top..........then buried with dirt. Cover the whole sheet of tin with dirt.
Make sure the edges of the tin are sealed with dirt, if you see any smoke coming out from the edges of the tin, put more dirt on it. You want an air tight seal.
This makes sort of an underground oven.

Let this cook overnight for large hogs, at least 8 to 12 hours for small ones.


The finished pork is fall apart tender. You can place the whole hog on a table and let people serve themselves, or pile the meat on a tray with sauces on the side.

Any leftover pork freezes well.......makes great sandwiches, tamales, enchiladas, etc..

Monday, March 19, 2007

Cooking Whole Hog on a Cinder Block Pit


Here is an easy way to cook whole hogs from 50 to 150lbs. without an expensive cooker. Cinder block pits are easy to use, cheap and portable. You have the option to use your favorite wood chips for flavoring, mesquite, hickory, fruit woods, whichever you like, or no wood chips at all.
Also you can season the pork with dry rub or marinade for a few hours or overnight. The choice is yours
Pigs cooked on the cinder block pit come out so tender and juicy. A must try for the person that enjoys cooking outside or cooking for a large group.


Things you will need.....
30 cinder blocks, 35 to 50lbs charcoal, wood chips (hickory, mesquite, or your favorite), rake or hoe, foil, drip pans, tin to cover, bricks to hold down tin, grate or expanded metal........Also, one nice looking 50 to 125lb pig.


Skin the pig or scald and scrape.
This one was skinned, head and feet removed.


Using an axe and a hammer, butterfly the pig so that it will lay flat on the cooker.
Place the blade of the axe on the spine, use the hammer to tap the back of the axe head, splitting the spine. If you do this on a pig that you have scalded and scraped, do not cut into the skin.
Tap the axe and repeat until you've split the length of the spine. Press the shoulders and legs to make the pig lay flat.


I made a marinade of orange juice, lime juice, garlic cloves, coarse salt, fresh ground black pepper, oregano and cilantro.
Make 1" slits into the meat with a knife and shove the garlic cloves and spices into the openings.
You can use your favorite marinade or skip this step completely. Also, dry rub is a good option.
Cover the pig with ice and let it marinade overnight.
If you want to skip this step, just chill the meat for a few hours before cooking.


Pick an area that has no grass. Set the cinder blocks up two rows high.
I line the bottom with foil to channel some of the dripping grease away from the heat to avoid flair ups.
You can add drip pans in the bottom if you like, these are optional. I filled my drip pans with apple juice seasoned with my favorite dry rub to add extra flavor to the meat while cooking.

Go ahead and light your charcoal, about 5lbs at each end of the pit. The charcoal goes under the hams and the shoulders only. Do not place any charcoal under the rib section of the pig. The heat from the coals under the hams and shoulders is enough to cook the whole pig.

After placing your foil and drip pans in the bottom, lay the grate across the blocks. Stainless is great, but any grill works good.
Add a third row of cinder blocks around the edge, (a fourth row if your pig is too tall to cover), place pig on the grate and cover with tin.


Keep a rake or hoe handy to move coals around if needed.


Place the pig on back side first, then turn on it's belly half way through. This one is ready to turn.


The whole cinderblock pit is covered with metal and held down with bricks if you live in a windy area.
One thing about the metal..... Do not used galvanized metal when cooking. In this case the cooker does not get hot enough to make any difference, but if you are cooking with a hot fire, the galvanized metal could give off fumes that could make you ill.
If you have nothing BUT galvanized metal, burn it with a blow torch or weed burner before using.

Add charcoal to each end of the cooker every 1 1/2 to 2 hours. Move an end block to allow room to throw 10 to 15 pieces of charcoal on top of the hot charcoal at each end. You do not need to have these fresh charcoals lit, the heat of the burning charcoals will light them. (you can burn wood in a separate pit and add those instead of charcoal)
You can also add soaked wood chips ( your favorites), while cooking. You do not need to add them every time you add charcoal, it will make the pork too smokey. Add a handful three or four times during the first few hours of the cooking process.
I used hickory on this one.


Half way through cooking time, remove tin, grab the legs and turn pig onto it's belly side.
This usually takes two people and gloves make the job a lot easier. The pig only needs to be turned once through the whole cooking process.
Check the rib section. If it's cooking too fast, cover with foil to keep from over cooking.
Cover and finish cooking.


Cook the pig to an internal temperature of 180 degrees. (Some folks use from 160 to 190......180 works for me:) ). This can take anywhere from 6 to 12 hours, depending on the size of the pig, and the weather conditions. Take the temperature in the thickest part of the ham with an instant read thermometor.
Let the meat rest for at least 20 minutes to equalize the juices. Move to serving table or plywood covered in foil and dig in. Serve your favorite sauces on the side.